Managing your LinkedIn inbox can feel overwhelming, but a structured system can save you time and help you focus on what matters most. Here’s a quick breakdown of how to take control of your messages:
- Use Labels and Split Inboxes: Categorize messages (e.g., "Hot Lead", "Follow Up") for clarity and create separate inbox views to stay organized.
- Set Up Snooze and Reminders: Temporarily hide messages and schedule follow-ups to ensure no opportunity is missed.
- Master Keyboard Shortcuts: Save hours each week by navigating and managing messages faster with simple key commands.
- Create Saved Snippets: Speed up responses with pre-written templates for common scenarios, keeping your tone consistent and professional.
- Sync with CRM Tools: Integrate LinkedIn with tools like HubSpot or Slack to streamline workflows and reduce manual data entry.
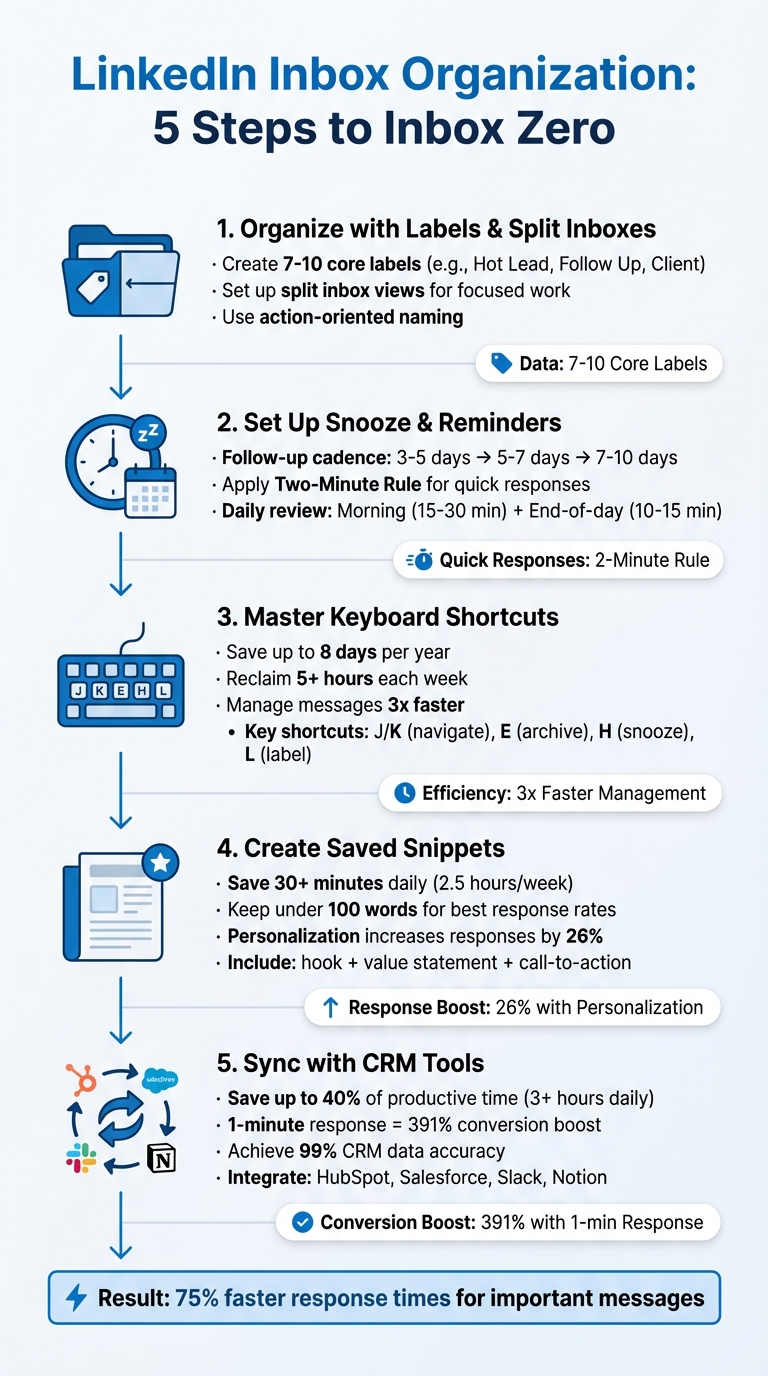
5-Step LinkedIn Inbox Organization System for Professionals
The LinkedIn Inbox Secret Nobody Talks About
sbb-itb-3e8f5dc
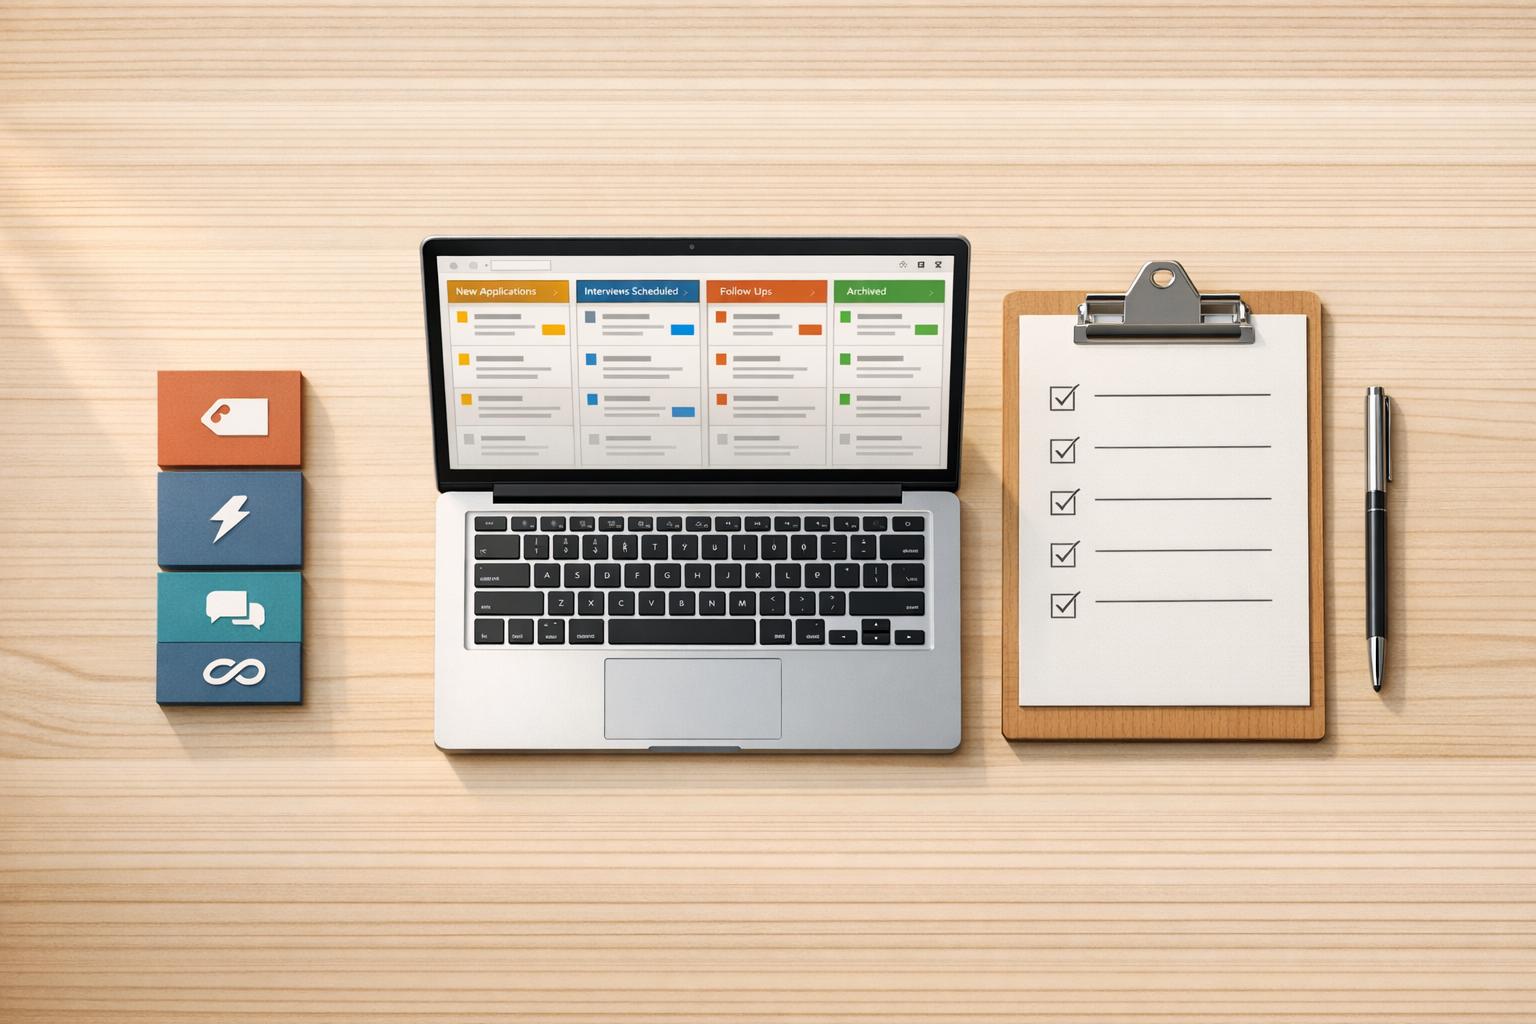
Step 1: Organize Messages with Labels and Split Inboxes
Managing LinkedIn messages effectively can feel like juggling too many balls at once. Every message – whether it’s a connection request, a client inquiry, or a group notification – gets lumped together. LinkedIn’s built-in filters like Unread, Starred, or InMail help a little, but they fall short when you’re handling dozens of conversations at different stages of your workflow.
The fix? Custom labels. These let you sort messages based on relationships (like "Hot Lead" or "Client"), actions needed ("Follow Up" or "Send Info"), or urgency levels ("High Priority" or "Low Priority"). This system gives you a quick visual snapshot of what each message is about and what needs to be done next.
Taking it up a notch, split inboxes allow you to view these labeled messages in separate tabs. Imagine having a dedicated inbox for hot leads, another for active clients, and a third for candidates. This setup minimizes distractions and helps you focus on one type of conversation at a time. By grouping similar tasks together, you save mental energy and work more efficiently.
How to Use Labels for Message Categories
Start by creating 7–10 core labels that align with your workflow. Apply them as soon as a message arrives or when its status changes. For example, if a prospect responds positively, move them from "Prospect" to "Hot Lead" right away. This keeps your system up to date and ensures no important conversation gets overlooked.
When naming your labels, use action-oriented terms. Labels like "Needs Reply" or "Proposal Sent" are clear and actionable, while something vague like "Important" might leave you guessing. To make your messages even easier to find, consider adding keywords (like "Collaboration" or "Recruitment") directly in the message body. LinkedIn’s search bar can then help you locate these conversations quickly.
How to Set Up Split Inboxes
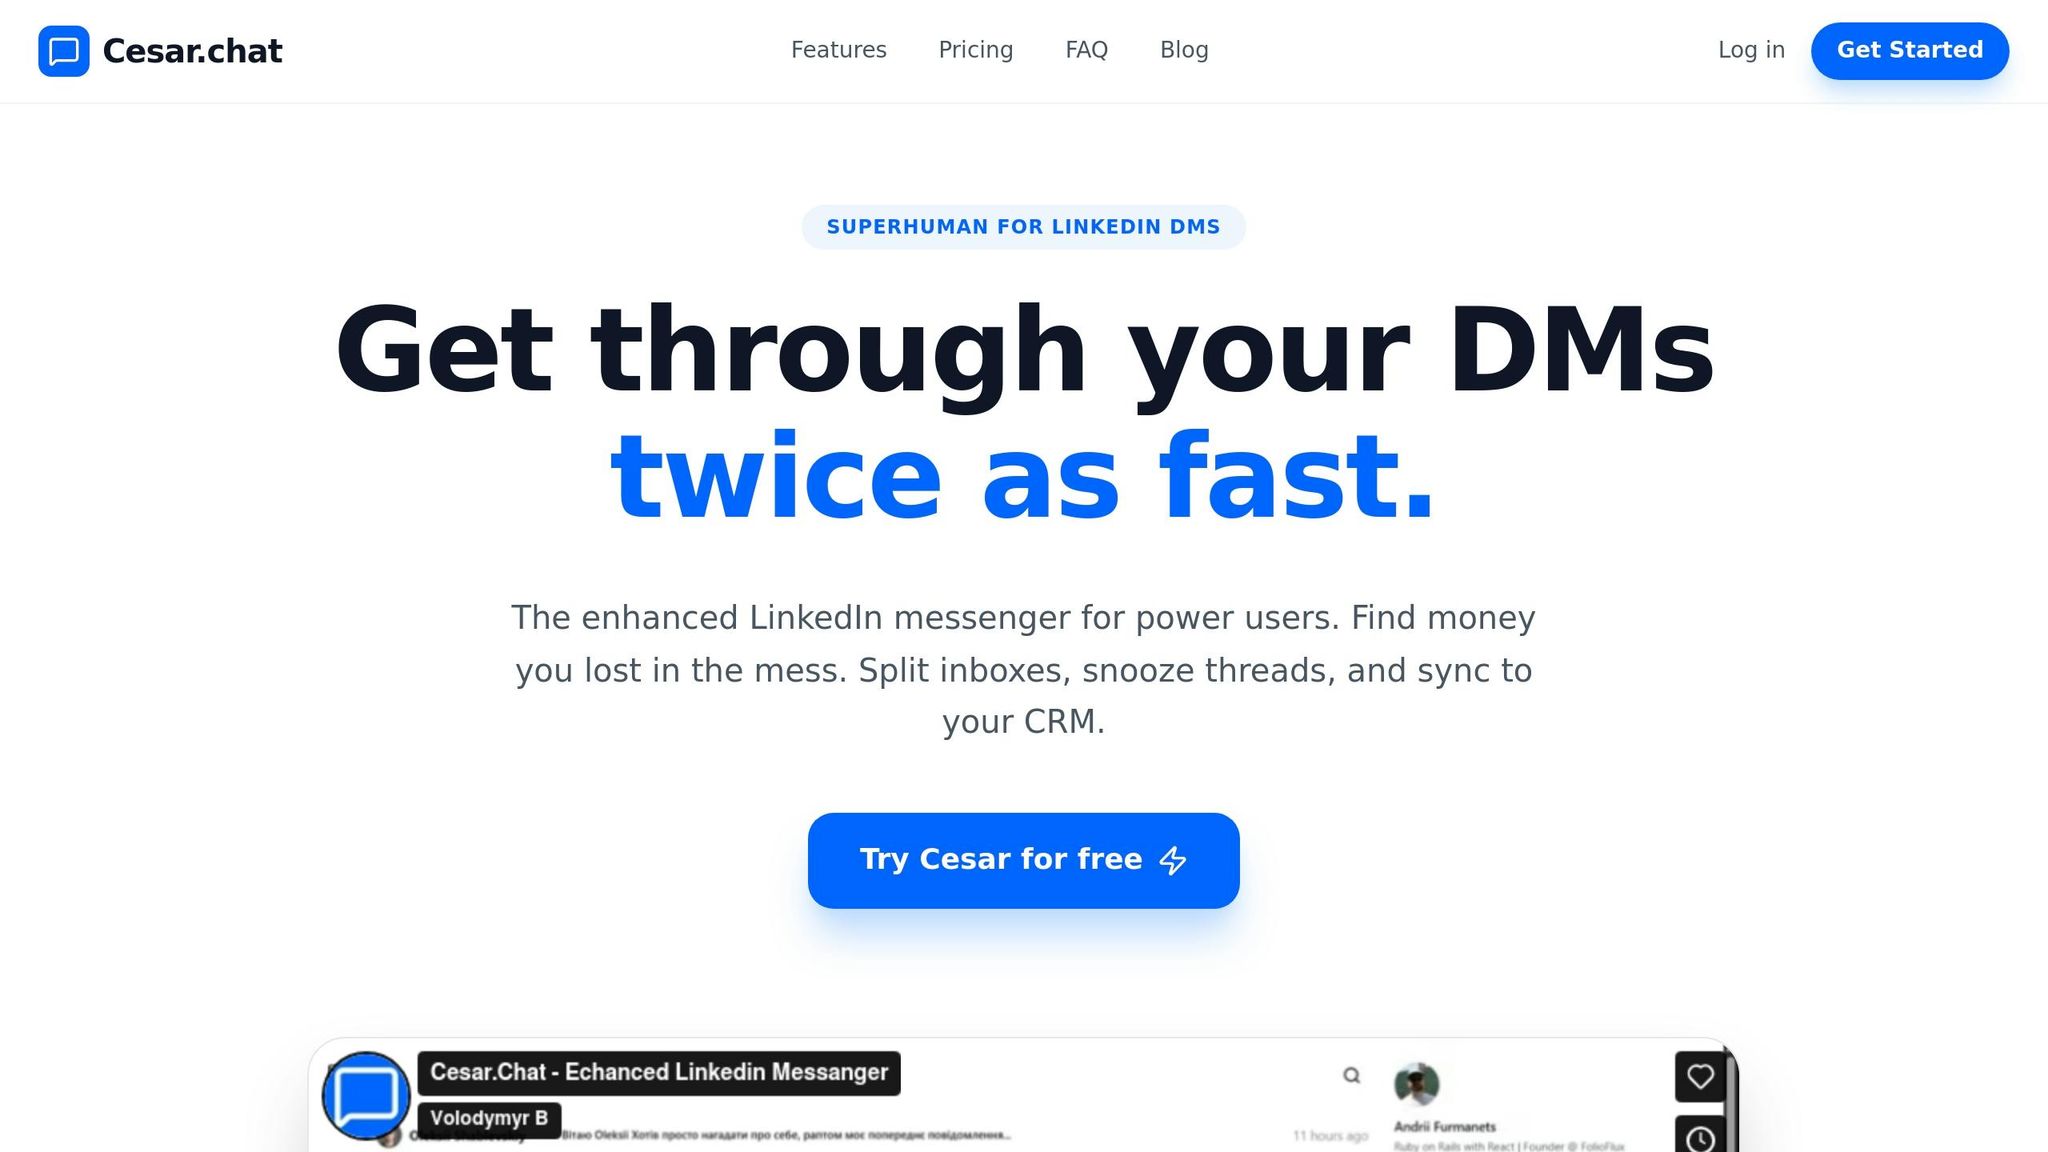
Split inboxes organize your labeled messages into separate, easy-to-navigate tabs. Tools like Cesar.chat let you set up these categories as distinct views. For example, you might start your day by checking the "Urgent" tab, tackle "Follow Up" messages in the afternoon, and save "Low Priority" items for the end of your workday.
To keep your split inboxes accurate, update each message’s category as its status changes. A lead who schedules a demo, for instance, should move from "Prospect" to "Qualified Lead." Once the deal closes, they can shift to "Client." This dynamic system ensures your inbox mirrors the current state of your workflow. And when a conversation is wrapped up, archive it. This clears your inbox while keeping the message searchable for future reference.
Next, we’ll dive into how snooze and reminder features can help you stay on top of your inbox without feeling overwhelmed.
Step 2: Set Up Snooze and Reminder Systems
Not every message needs your immediate attention. Some conversations naturally take time – like waiting for a proposal approval, following up after a networking event, or holding on for a hiring decision weeks down the line. The problem? LinkedIn doesn’t offer a true snooze feature. Without one, important messages can easily get buried under an avalanche of new chats.
A reliable snooze system temporarily removes a message from your inbox and brings it back to the top when it’s time to act. This keeps your inbox clean and ensures you don’t miss anything important. Without such a system, you run the risk of forgetting about key opportunities.
How to Snooze Messages for Later Follow-Up
When a message doesn’t require immediate action, schedule it to pop back up at a more appropriate time. For instance, if a prospect tells you they’ll have a decision by Friday, set a reminder for Friday at 10:00 AM. The message will vanish from your active inbox and reappear right when you need to follow up. Tools like Cesar.chat make this process seamless with a dedicated snooze feature. Even better, their Smart Cancellation feature automatically cancels your reminder if the recipient responds before the snooze period ends. Quick keyboard shortcuts, like pressing "H" to snooze, make it even easier.
Consistency is key when it comes to follow-ups. Stick to a proven cadence to improve your response rate. Start with your first follow-up 3–5 business days after the initial message, send a second one 5–7 business days later, and follow up a final time 7–10 business days after that. For messages requiring less than two minutes of your time, apply the Two-Minute Rule: respond immediately, archive it, or snooze it if it needs more focus. This system keeps your inbox organized and ensures conversations keep moving forward.
By snoozing lower-priority messages, you can focus on what matters most. Pair this strategy with a daily review routine to stay on top of all your scheduled reminders.
Create a Daily Inbox Review Routine
To manage your inbox effectively, set aside time twice a day for processing messages and reminders. Start with a Morning Triage session (15–30 minutes) to handle new messages and decide whether to reply, archive, snooze, or label them. Then, wrap up your day with an End-of-Day Cleanup session (10–15 minutes) to address tasks and review any upcoming reminders. To stay focused, disable notifications and stick to these two dedicated review sessions.
This routine builds on your earlier labeling and split inbox setup. During your morning review, prioritize messages labeled "Urgent" or "High Priority." Mid-day, check on "Follow Up" items and snooze those that need more time. At the end of the day, clear out general messages and archive conversations that are resolved. This process ensures your inbox stays organized and that every message gets the attention it deserves – without taking over your schedule.
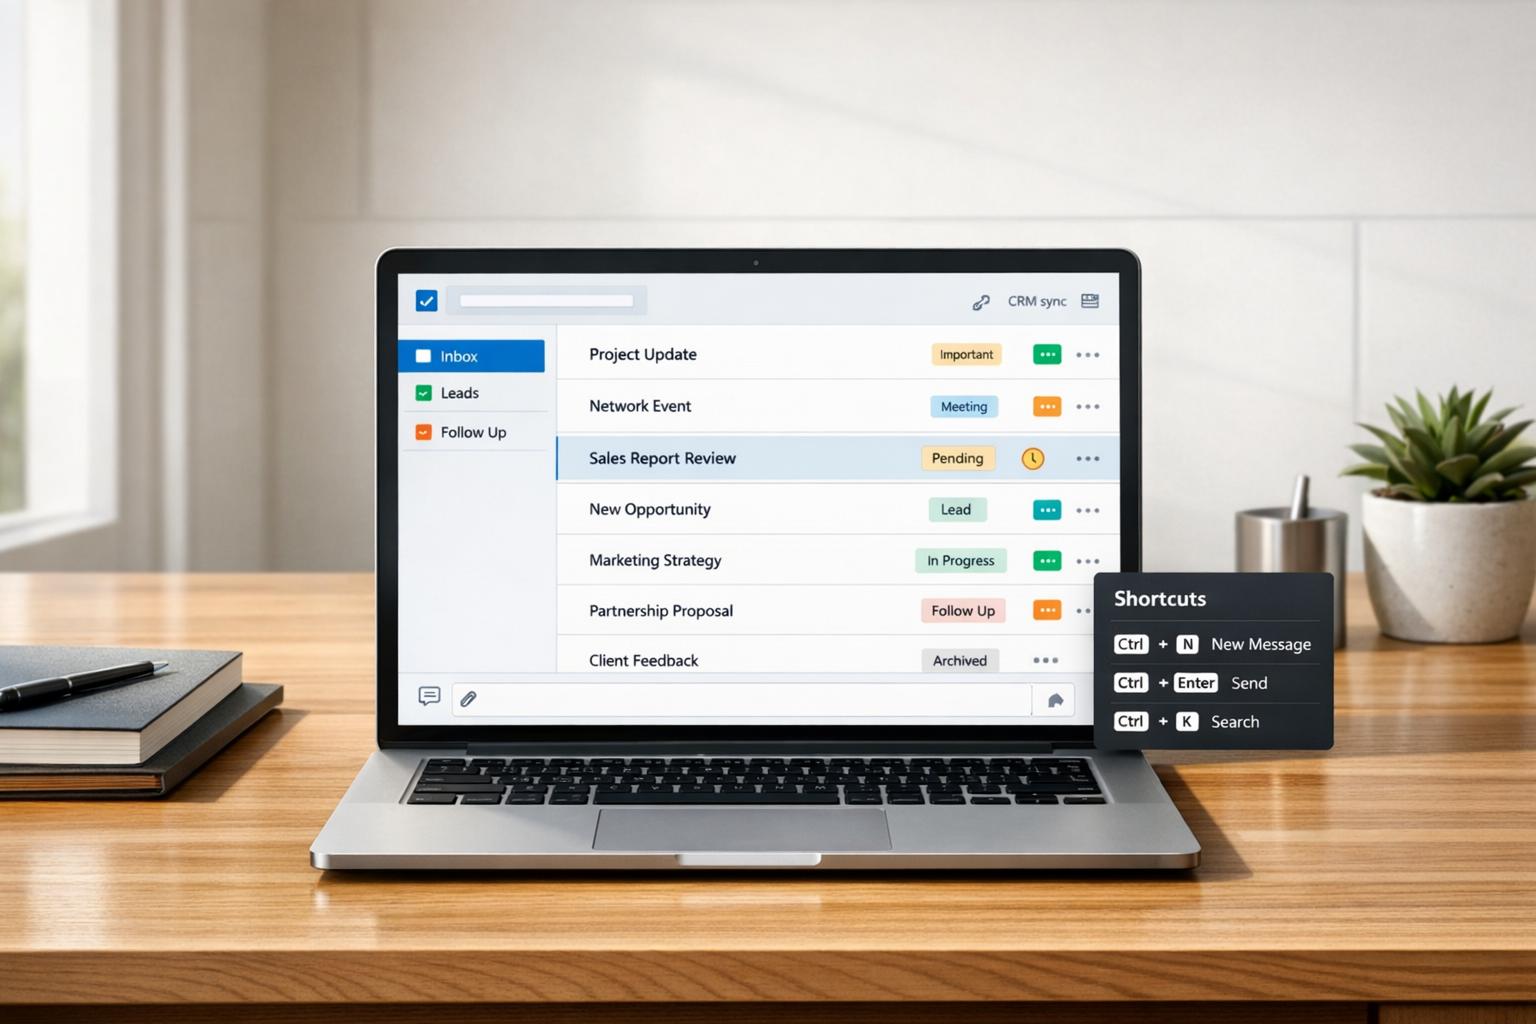
Step 3: Use Keyboard Shortcuts to Navigate Faster
Using a mouse to navigate LinkedIn can eat up a surprising amount of time – keyboard shortcuts, on the other hand, can save professionals up to 8 days per year and reclaim more than 5 hours each week. The challenge? LinkedIn’s built-in messaging tools don’t offer robust shortcuts for tasks like labeling, snoozing, or archiving messages. That’s where Cesar.chat steps in, providing a streamlined, keyboard-first experience that allows you to manage messages up to 3x faster. Instead of clicking through menus or hunting for buttons, you can handle everything with quick key presses.
Here’s how it works: use J and K to navigate your inbox, then apply action keys to triage messages instantly. This eliminates the constant switching between your keyboard and mouse, helping you maintain focus and speed up your workflow. These shortcuts integrate seamlessly with your labeling and snoozing habits, ensuring your inbox stays organized without extra effort.
Learn the Most Useful Shortcuts
To keep things simple, start with the "Big Four" shortcuts. Use J to move down your conversation list and K to move up – no mouse needed. Once you’ve selected a message, press E to archive it, L to label it, or H to snooze it for later. Mastering just these four shortcuts will drastically improve your message management speed.
The Command Palette (Cmd/Ctrl+K) acts as your control hub. With a single press, you can search conversations, execute actions, or access features without navigating menus. Need more context on a sender? Press I to open their LinkedIn profile in a new tab – this small step makes prospects 86% more likely to accept your connection requests. And for quick replies, use ; (semicolon) to insert pre-saved response templates with personalization fields like {firstName}, cutting a 30-minute typing session down to just 5 seconds.
Here’s a handy cheat sheet for these shortcuts:
| Shortcut | Action | Purpose |
|---|---|---|
J / K |
Navigate Down / Up | Browse messages without touching the mouse |
E |
Archive | Clear out messages you’ve handled |
H |
Snooze / Remind | Temporarily hide messages for follow-up |
L |
Label | Organize conversations by priority or type |
I |
Open Profile | View sender’s LinkedIn profile for context |
; |
Insert Snippet | Use pre-written templates instantly |
Cmd/Ctrl+K |
Command Palette | Access all actions and search instantly |
Professionals who adopt structured inbox management systems like this report 75% faster response times for important messages.
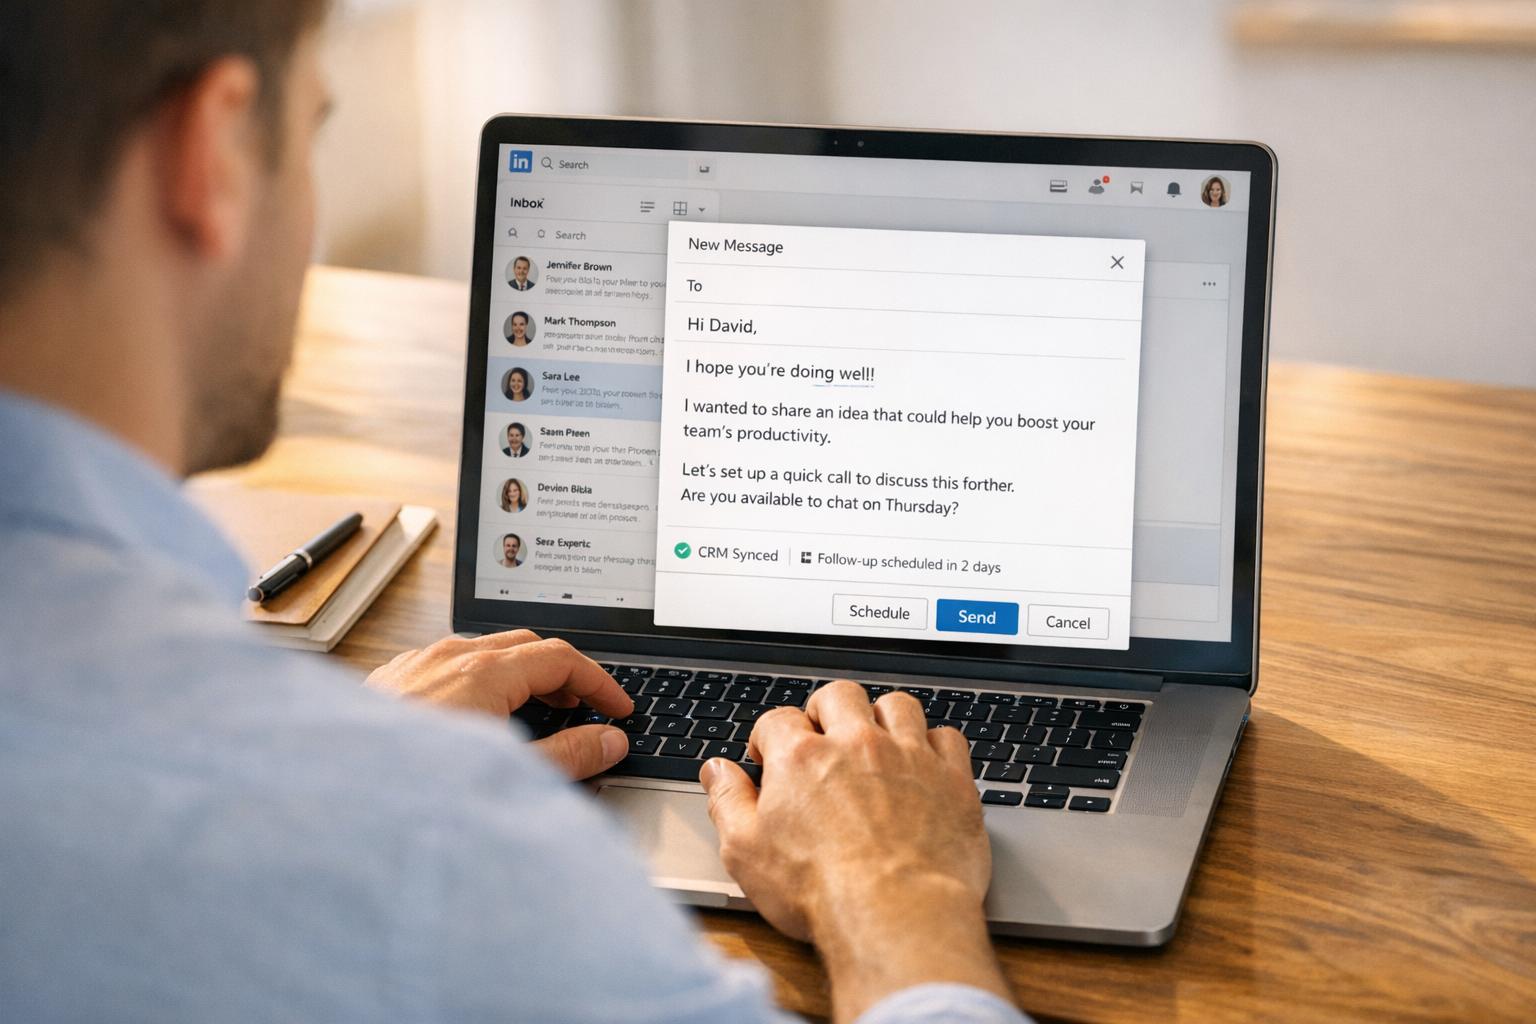
Step 4: Create Saved Snippets for Common Replies
Typing out the same responses over and over? That’s a surefire way to waste time. Whether you’re scheduling meetings, following up with leads, or answering FAQs, saved snippets can help. They cut down on repetitive typing while keeping your tone polished and professional. In fact, professionals who use snippet-based systems report saving at least 30 minutes a day on manual messaging. That adds up to over 2.5 hours a week – time you can spend on conversations that truly matter. Combined with faster navigation, saved snippets make your workflow even smoother.
Build a collection of templates for your most frequent scenarios – like post-connection messages, event follow-ups, or "no response" nudges. Each snippet should include three key elements: a hook (why you’re reaching out), a value statement (what’s in it for them), and a clear call-to-action (what to do next). Keep them concise – under 100 words for the best response rates – and use dynamic variables like {firstName} or {companyName} to keep messages personalized without extra effort.
"The most common mistake I see is excessive message length. My recommendation is to focus on one clear point and make it effortless for the recipient to respond with minimal consideration time." – Laura Hannah, Founder of Pitch121
In Cesar.chat, you can instantly access your saved snippets by typing / followed by the snippet name. This handy feature automatically fills in recipient details, ensuring your messages stay consistent and personalized.
How to Write and Save Response Templates
Start by identifying five key scenarios you encounter often – like thank-you messages, meeting proposals, follow-ups, resource sharing, or pricing inquiries. Draft concise snippets for each. For cold outreach, aim for 50–75 words, and for warmer connections, go up to 150 words. Use line breaks to keep your text easy to read, especially since many people check messages on their phones.
Focus on the recipient’s needs first. Instead of saying, "I’d like to schedule a call to discuss our services", try something like: "I noticed your team is expanding into the Northeast – here’s a resource on regional hiring trends. Would a 15-minute call next Tuesday work to discuss your strategy?" This approach shows genuine interest and increases engagement.
Skip the hard sell in your initial outreach. A thoughtful second follow-up can boost reply rates by 4.05% compared to the first message. Make sure your follow-up offers something new, like a relevant article or insight, rather than simply checking in. For example, reference a recent industry trend and include a simple question to keep the conversation going.
Organize your snippets with clear names and tags like "Meeting Scheduling", "Follow-up", or "Pricing". This makes it easy to find the right response quickly, even when juggling multiple conversations. For instance, typing /meeting in Cesar.chat could instantly bring up your meeting scheduling template, complete with all the necessary details.
Don’t forget to personalize before hitting send. Add a specific detail about the recipient, like a recent post they shared, a mutual connection, or something from their profile. Personalized messages can increase response rates by 26% compared to generic ones. This way, you get the efficiency of automation without losing the personal touch.
Finally, schedule time each month to review your snippet library. Remove outdated templates and tweak your wording based on what’s working. The goal? A streamlined, effective set of snippets that covers your most common scenarios without overwhelming you with options.
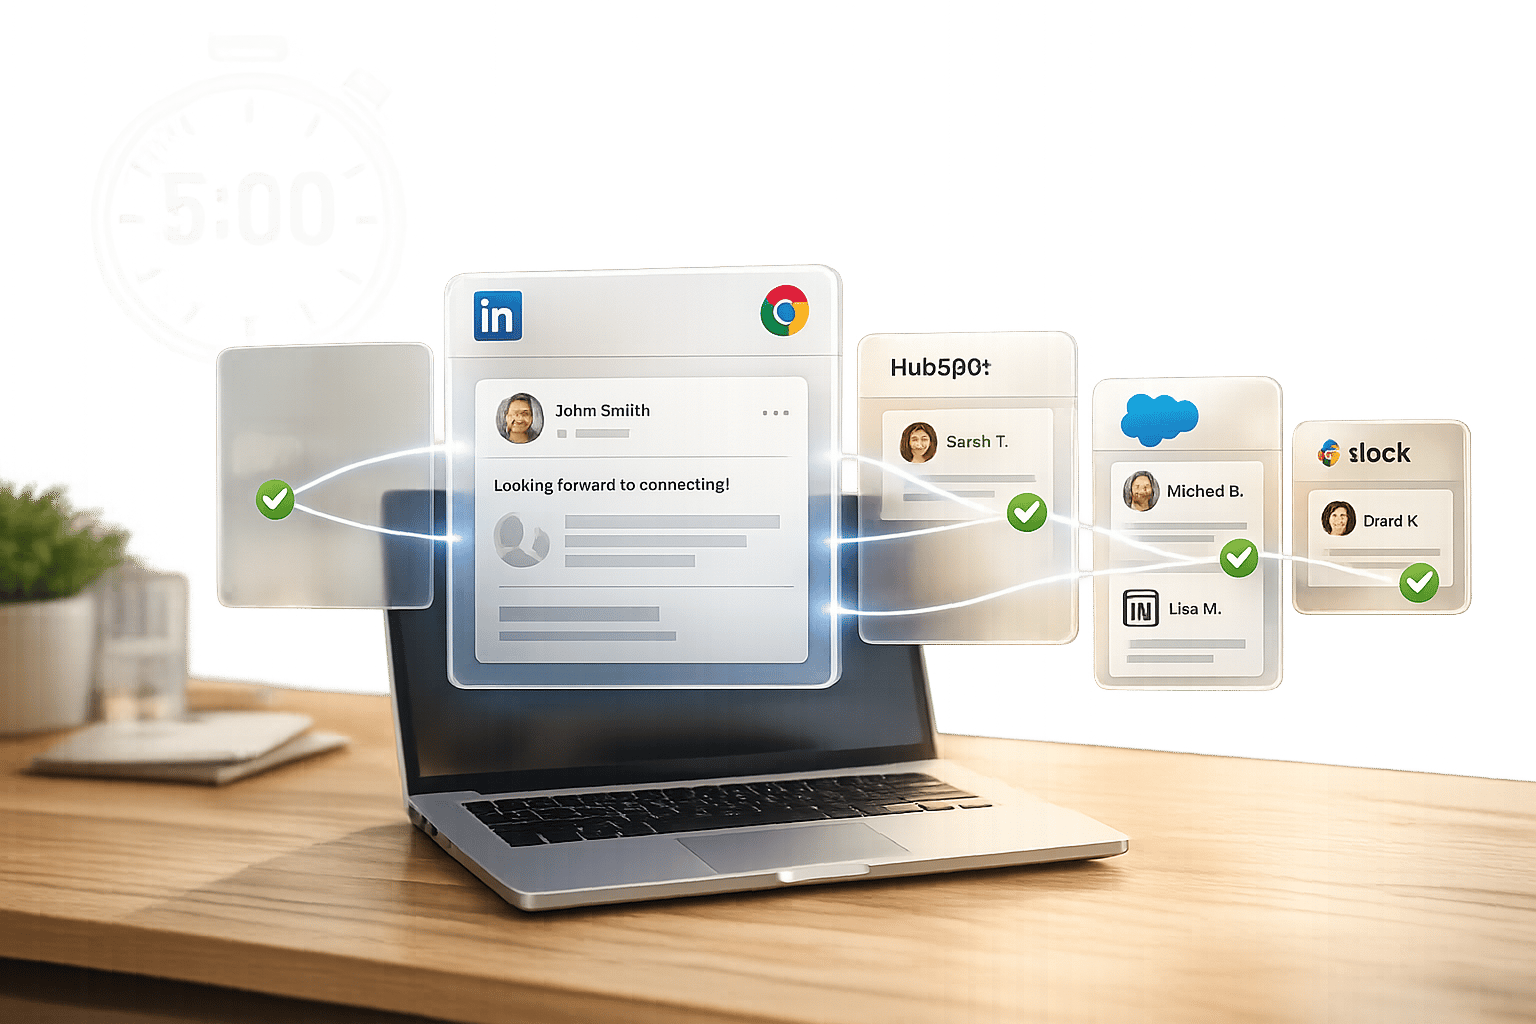
Step 5: Connect LinkedIn with Your CRM and Productivity Tools
Did you know that a disconnected LinkedIn inbox and CRM setup can waste up to 40% of your productive time? That translates to more than 3 hours daily spent on manual data entry. If your prospecting happens on LinkedIn but your deal management is in HubSpot, you’re likely dealing with a fragmented workflow. The fix? Sync your LinkedIn conversations directly with your CRM and productivity tools. This integration creates a unified timeline that combines calls, emails, and LinkedIn messages in chronological order.
Once linked, your LinkedIn activity can automatically trigger workflows – like assigning leads, scheduling follow-ups, or updating lead scores – without lifting a finger. Speed matters: responding to a lead within one minute can boost conversions by an astounding 391%. Having all your communication in one place ensures you can act quickly when it counts. From here, the next step is to select a Cesar.chat plan that fits your integration needs.
Pick the Right Cesar.chat Plan for Your Needs
To sync LinkedIn with your CRM, you’ll need either the Business plan ($32/month) or the Enterprise plan ($40/month). The Basic plan, while affordable, doesn’t include integrations. The Business plan supports up to three integrations with platforms like HubSpot, Salesforce, Notion, Slack, Clay, Zapier, and Make. For those needing more flexibility, the Enterprise plan offers unlimited integrations, white-glove setup, and VIP support.
| Plan | Price | Key Features for CRM/Productivity |
|---|---|---|
| Basic | $24/month | Unlimited labels/snippets, reminders; No integrations |
| Business | $32/month | Up to 3 integrations, Sales Navigator support, analytics |
| Enterprise | $40/month | Unlimited integrations, white-glove setup, VIP support |
Native integrations with tools like Sales Navigator Advanced Plus and HubSpot Sales Professional can be pricey. Cesar.chat offers a more budget-friendly option while ensuring secure and reliable data syncing without jeopardizing your account.
How to Sync with HubSpot, Slack, and Other Tools
Once you’ve chosen your plan, it’s time to start syncing. Begin by connecting your primary CRM, such as HubSpot, to automatically log conversation data, labels, and notes. This integration can trigger workflows and even send real-time Slack alerts when high-priority leads engage with you. For instance, tagging a lead as "Hot Lead" in Cesar.chat will sync that label to your CRM, ensuring your team can prioritize follow-ups effectively.
For project management, syncing LinkedIn data with Notion allows you to track both initial outreach and ongoing deals in one place. This creates a centralized hub where every interaction is logged and accessible to your team. Some sync tools even allow you to pull in your entire conversation history when you first connect a contact – not just future messages. By consolidating all your messaging data, you can streamline your workflow and improve data accuracy. In fact, this approach can lead to 99% CRM data accuracy while saving 5+ hours per week by eliminating manual tasks.
"Stop manually copying LinkedIn conversations into HubSpot. This comprehensive guide shows you exactly how to sync LinkedIn messages to HubSpot automatically and reclaim 15+ hours per week for actual selling." – LeadCRM
Build a Daily Workflow to Reach Inbox Zero
To keep your LinkedIn inbox manageable, think of it as a processing station, not a storage space. The aim is to make decisions on messages quickly, rather than letting them pile up. Research shows professionals spend nearly 28% of their workday reading and answering messages, with disorganized communication wasting up to 3.1 hours daily. By following a structured daily workflow, you can efficiently process messages in set time blocks using four key actions: label, snooze, reply, and archive. Here’s how to turn your inbox into a clutter-free, efficient workspace.
Schedule Time Blocks for Message Processing
Resist the urge to check your inbox constantly. Instead, set aside 2–3 specific time blocks each day:
- Morning session (15–20 minutes): Address overnight messages.
- Midday check-in (5–10 minutes): Focus on high-priority leads.
- End-of-day cleanup (10–15 minutes): Wrap up remaining tasks and plan follow-ups.
Add these sessions to your calendar to minimize interruptions, and disable push notifications outside these periods. Why? Because each interruption can cost you about 23 minutes of focus.
Use the 4-Action Method: Label, Snooze, Reply, Archive
Every message should be processed using one of these four actions:
- Label: Organize messages by stage (e.g., "New Lead" or "Meeting Scheduled") or by priority (e.g., "Hot Lead" or "Warm Lead"). This reduces mental clutter and keeps your inbox structured.
- Snooze: Temporarily hide conversations requiring follow-up, so they reappear at a more convenient time.
- Reply: If a reply takes less than two minutes, respond immediately. Use saved templates with variables like
{firstName}to make responses quick and personalized. - Archive: Move completed or irrelevant threads out of sight without deleting them, ensuring they remain searchable.
Keyboard shortcuts can speed up these actions even more. Responding to messages within one hour of initial contact can increase conversion rates by up to seven times compared to waiting 24 hours.
"Inbox Zero is about straightforward processing, not endless organizing or deleting." – Martine Ellis, Productivity Researcher
Bulk Archive Old Messages
Once you’ve processed your daily messages, tackle older ones to maintain a clean inbox. Use Cesar.chat’s bulk selection tool to archive messages older than two weeks. Remember, archiving doesn’t delete messages – they stay searchable, and any reply to an archived thread will automatically bring it back to your inbox. This initial cleanup gives you a fresh start, and sticking to your scheduled time blocks and the 4-Action Method will help you avoid backlogs in the future.
Conclusion
Transforming your LinkedIn inbox into a well-organized hub can significantly enhance your professional growth. Keeping your inbox in order not only safeguards your reputation but also ensures you never miss out on valuable opportunities. By applying the five steps outlined in this guide, you’ll simplify message management, prioritize key connections, and maintain consistent follow-ups that turn casual interactions into meaningful business relationships.
The difference between a cluttered inbox and an efficient one often lies in having the right tools and strategies. Cesar.chat offers features like split inboxes, keyboard shortcuts, and CRM sync to help you stay on top of your messages. Whether you’re juggling a handful or hundreds of conversations each week, these tools ensure that no message gets overlooked and every interaction receives the attention it deserves.
Start by implementing clear labels, scheduling dedicated review times, and making use of keyboard shortcuts. Then, take it a step further with saved snippets and integrations for smoother follow-ups. Combining these tactics with the 4-Action Method and scheduled review sessions will help you turn every conversation into a productive outcome. As Vedran Rasic, CEO and Co-founder of LeadDelta, emphasizes:
"LinkedIn is all about conversations, your inbox is where the magic happens. All the friendships, recruiting, and sales deals are made here".
Think of your inbox as your professional command center. Managing it effectively allows you to nurture stronger relationships, close deals faster, and elevate your professional image.
FAQs
What labels should I use in my LinkedIn inbox?
Organizing your LinkedIn inbox can be a game-changer for staying on top of important conversations. Using labels is a simple yet effective way to categorize and prioritize messages. Here are some label ideas to consider:
- Urgent / High Priority: For messages that need immediate attention.
- Follow-up / Pending Response: To track conversations that require follow-up or are awaiting replies.
- Leads / Prospects: Ideal for potential business opportunities or sales leads.
- Candidates / Applicants: Perfect for recruiters managing job applications.
- Clients / Partners: Helps you keep track of ongoing conversations with existing clients or collaborators.
These labels make it easier to stay organized and ensure that no critical messages slip through the cracks.
How can I snooze LinkedIn messages for follow-ups?
If you’re juggling multiple conversations on LinkedIn, tools with a message reminder feature can be a lifesaver. These tools let you “snooze” messages by setting custom dates for them to pop back up at the top of your inbox. It’s a simple way to ensure you never miss an important follow-up while keeping your inbox organized. Plus, it helps you focus on what needs attention right now without losing track of other conversations.
What Cesar.chat plan is required for CRM sync?
To sync your CRM, you’ll need the Business plan. This plan provides the tools required to connect with your CRM and simplify your workflow.