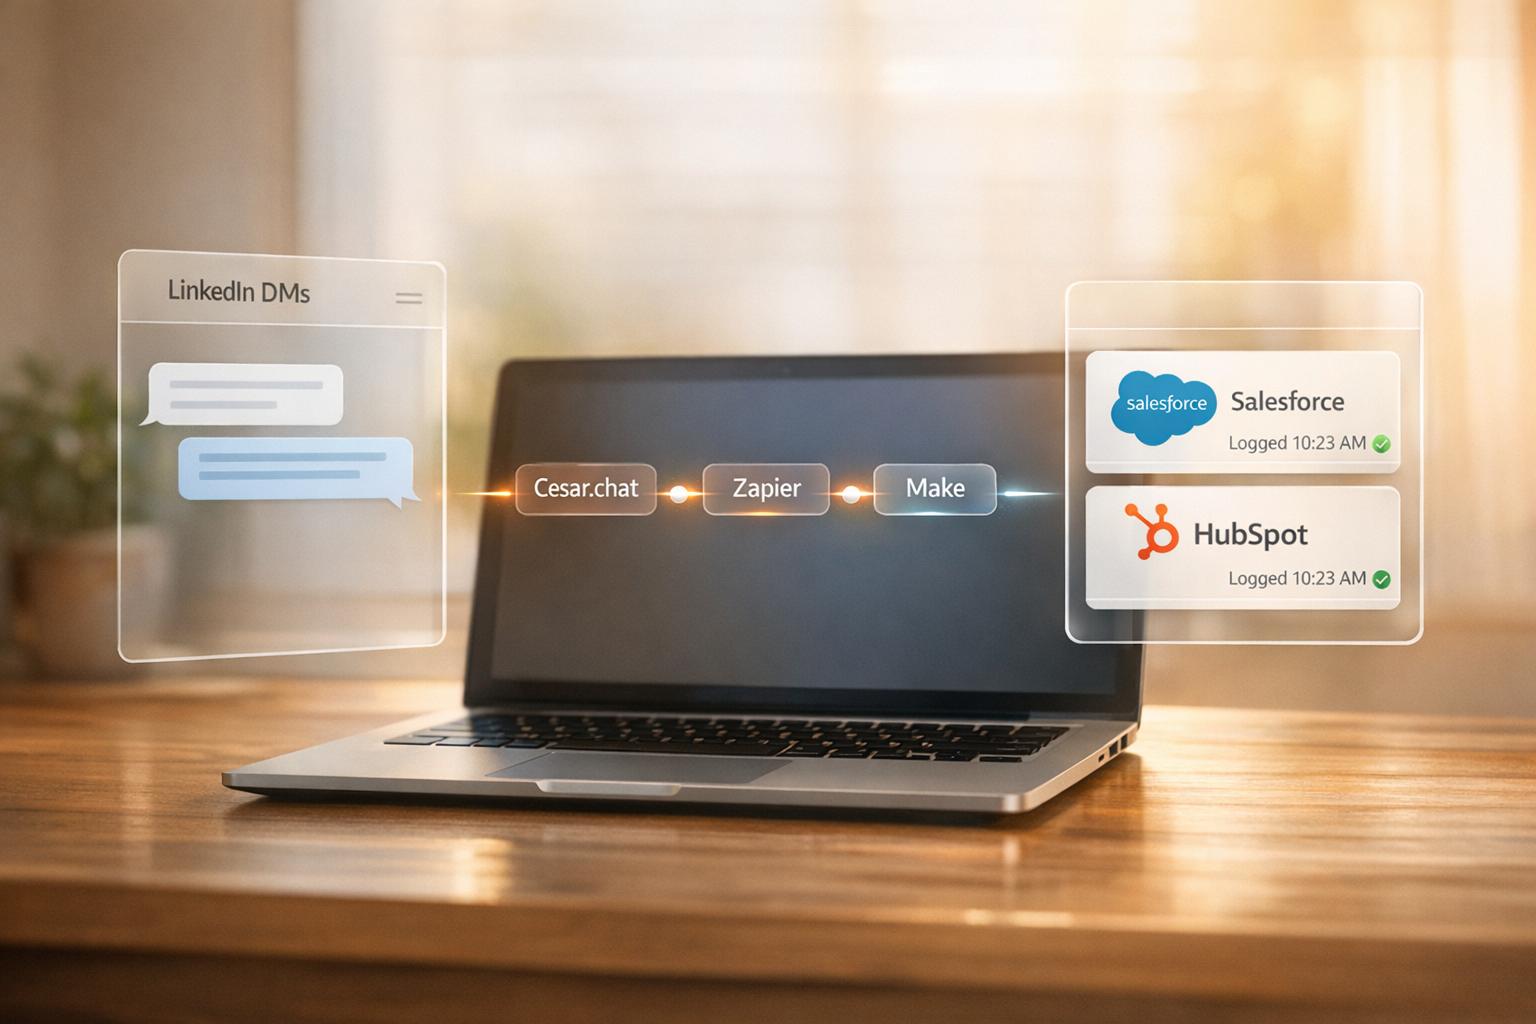
If you’re tired of manually logging LinkedIn messages into your CRM, there’s a faster way. By using Cesar.chat, you can connect your LinkedIn inbox to CRMs like HubSpot, Salesforce, Notion, and Slack in just a few steps. This integration saves hours of work every week by automating data transfers, ensuring all your LinkedIn conversations, labels, and notes sync directly with your CRM in real time.
Key Steps:
- Install Cesar.chat: Download the Chrome extension and create an account.
- Connect LinkedIn: Authorize access to sync your LinkedIn messages.
- Set Up CRM Integration: Link your CRM (e.g., HubSpot, Salesforce) and configure sync settings.
- Test and Troubleshoot: Verify the connection and resolve any issues like expired tokens or permission errors.
Plans Required:
- Business Plan: $32/month for up to 3 integrations.
- Enterprise Plan: $40/month for unlimited integrations and VIP support.
By automating message logging, you can reclaim over 15 hours weekly, improve team collaboration, and keep your CRM updated effortlessly. Follow the steps above to set it up in minutes and focus more on selling.
5 ways to integrate LinkedIn with your CRM for better sales-marketing collaboration
sbb-itb-3e8f5dc
What You Need Before Starting
Before diving in, make sure you have everything lined up to ensure a smooth setup process.
Cesar.chat Plan Requirements
CRM integration and live sync features are exclusive to Cesar.chat’s Business and Enterprise plans. Here’s what you need to know:
- Business Plan: Costs $32/month and supports up to three integrations. Perfect if you’re syncing tools like HubSpot or Slack.
- Enterprise Plan: Costs $40/month and includes unlimited sync destinations, white-glove setup, and VIP support.
If you’re on the Basic Plan ($24/month), you’ll have access to handy features like labels, snippets, and reminders, but CRM integrations are not included. To sync LinkedIn conversations with your CRM, upgrading to Business or Enterprise is necessary. Opt for annual billing on either plan to save 20%.
Essential Accounts and Tools
To get started, you’ll also need the following:
- LinkedIn Account: Whether you use a standard account or Sales Navigator, both work seamlessly with the Business and Enterprise plans.
- CRM Access: Have administrative access and login credentials ready for your CRM (e.g., HubSpot, Salesforce, Notion, Clay, Slack, Zapier, or Make).
- Chrome Browser: Cesar.chat operates as a Chrome extension, so you’ll need Chrome installed.
The extension integrates with LinkedIn as a secure messaging layer, relying on API interactions rather than scraping.
Once you have these essentials, you’re ready to sync your LinkedIn account with your CRM effortlessly.
How to Sync LinkedIn with Your CRM in 5 Minutes
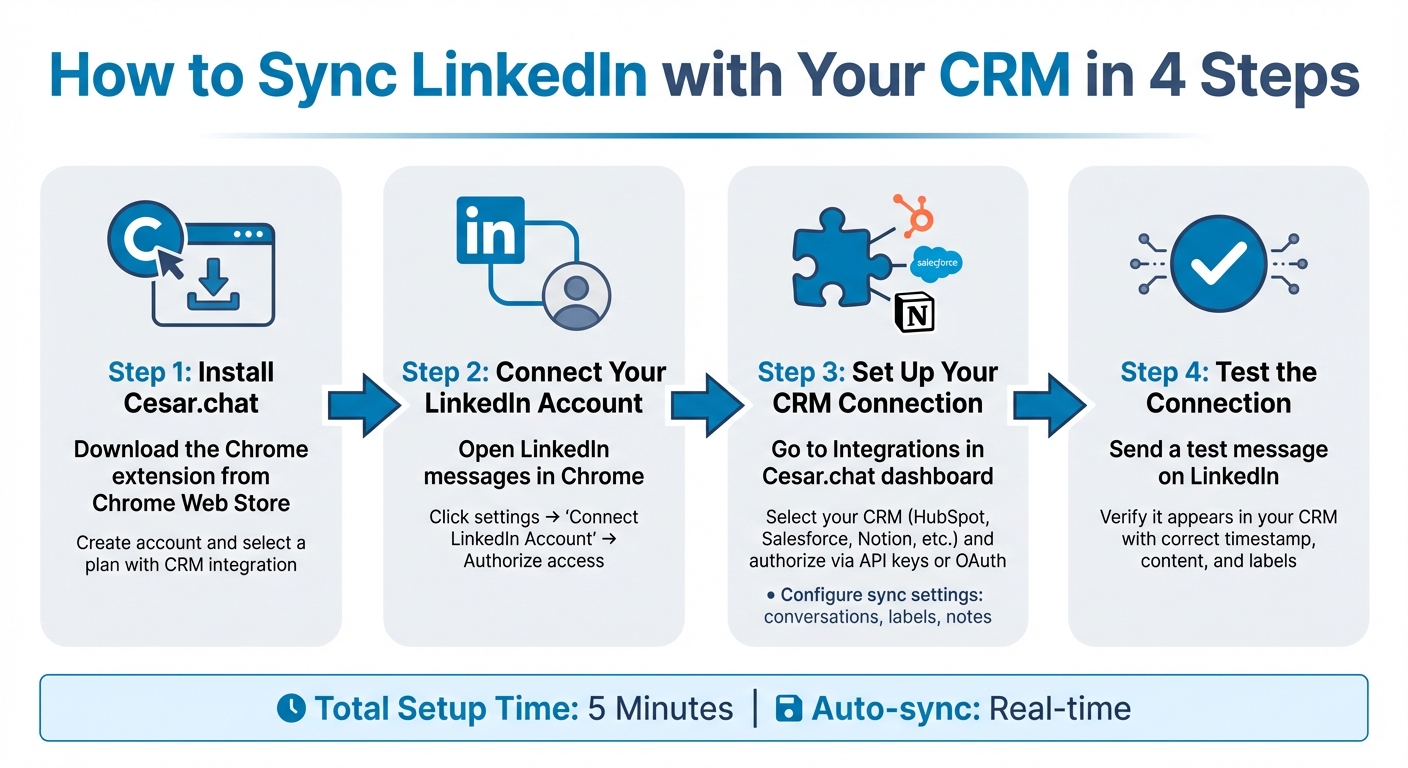
How to Sync LinkedIn with Your CRM in 4 Steps
Once you’ve got your plan sorted and credentials ready, setting up the integration takes just a few clicks. Here’s how to connect your LinkedIn messages to your CRM quickly and easily.
Step 1: Install Cesar.chat
Start by visiting the Chrome Web Store and searching for "Cesar.chat." Download and install the extension. After installation, click on the extension icon to create your account. During the signup process, make sure to select a plan that includes CRM integration.
Once you’re logged in, Cesar.chat adds a messaging layer directly over your LinkedIn inbox, making it ready for syncing.
Step 2: Connect Your LinkedIn Account
Open LinkedIn in Chrome and navigate to your messages. Cesar.chat will automatically overlay your inbox. Click the settings icon within the Cesar.chat interface and select "Connect LinkedIn Account." If you’re not already logged in to LinkedIn, you’ll be prompted to do so and authorize access.
"Cesar.chat gets your messages from LinkedIn’s internal APIs. Whatever messages you send and receive on LinkedIn are synced to Cesar and vice versa."
Step 3: Set Up Your CRM Connection
In the Cesar.chat dashboard, go to Integrations and select your CRM from the list. Supported options include HubSpot, Salesforce, Notion, Clay, Zapier, Make, and Slack. Click "Add Integration" and follow the steps to either enter your API keys or complete the OAuth authorization process (you can find these credentials in your CRM’s settings).
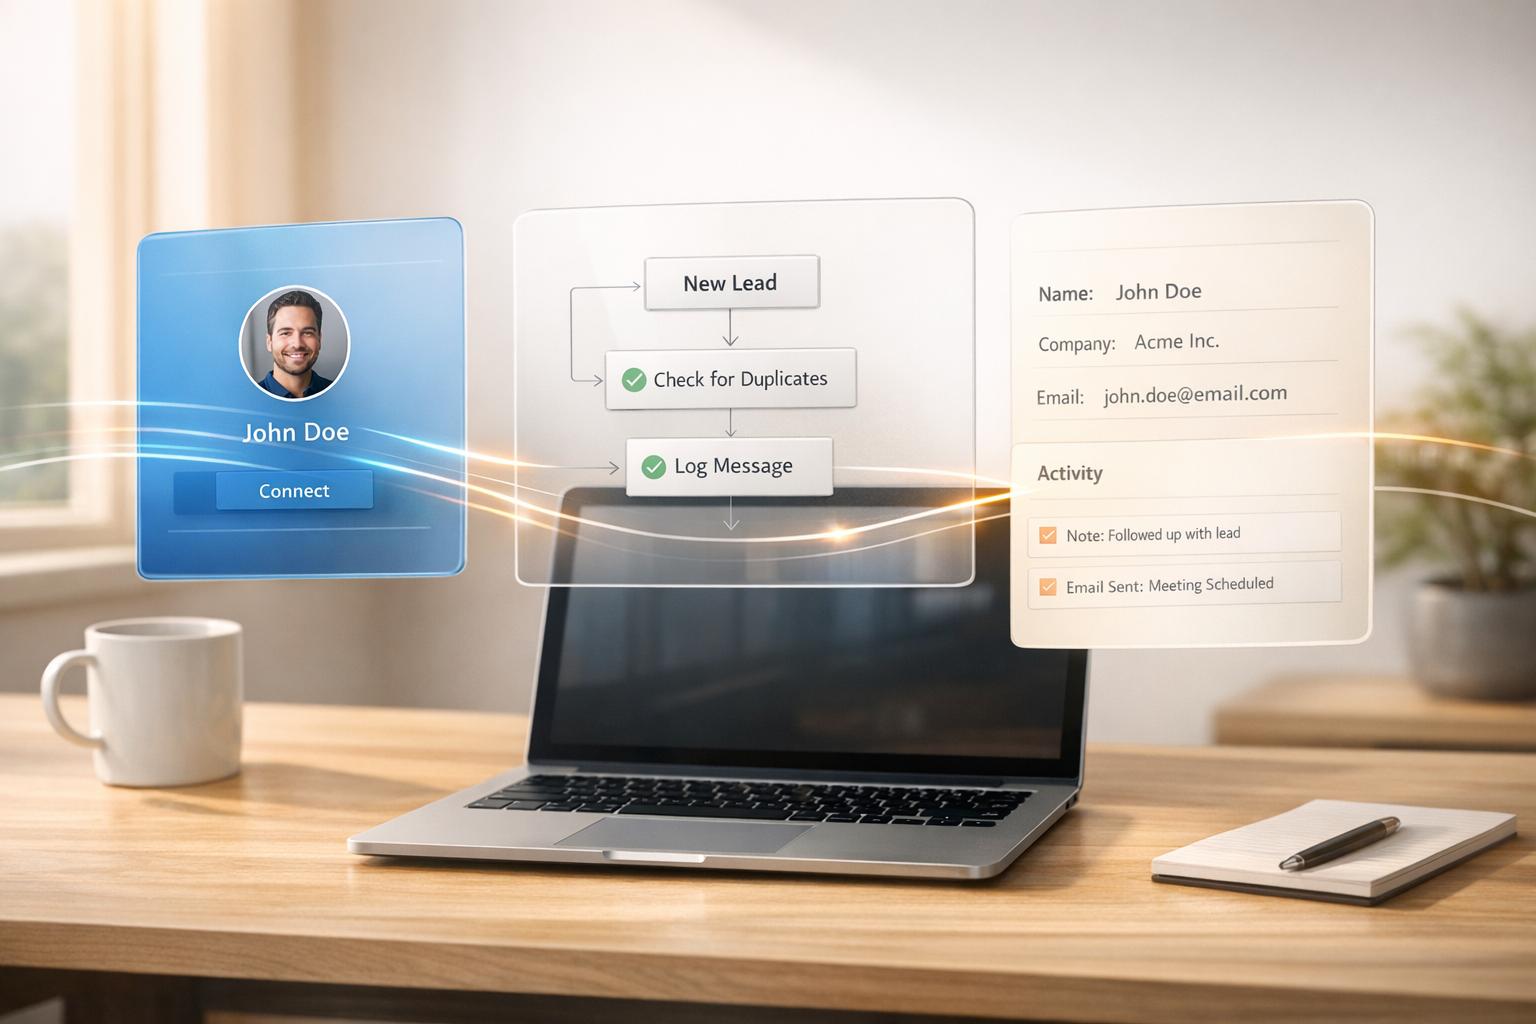
After connecting, configure what data to sync. For instance, you can choose to sync conversation history, custom labels, or notes. If you label a chat as "Hot Lead" in Cesar.chat, that label will automatically show up in your CRM contact record. The number of integrations you can set up depends on your plan.
Step 4: Test the Connection
To ensure everything is working, send a test message to one of your LinkedIn connections or reply to an existing thread. Then, check your CRM after a few seconds. You should see the conversation appear with the correct timestamp, message content, and any labels you’ve applied.
If the test message syncs correctly, the live integration is active. From now on, every message, note, or label will automatically update in your CRM, letting you focus on building meaningful connections and closing deals.
Fixing Problems and Improving Your Sync
If your integration isn’t syncing as it should, take a look at these troubleshooting tips.
Sometimes, even after setup, sync issues can pop up. The most common culprits? Permission errors, expired tokens, or data field mismatches between LinkedIn and your CRM. If messages don’t show up in your CRM after a few minutes, start by checking your admin privileges. You’ll need "Super Admin" access in HubSpot or "System Administrator" rights in Dynamics 365 to properly configure and maintain integrations.
Another common hiccup is authentication expiration. Some CRM connections require token renewal every 90 days. If your sync suddenly stops working, head to the Integrations tab in your Cesar.chat dashboard and re-authorize the connection. In some cases, clearing your browser cache or switching to an incognito window can help resolve browser-related issues.
To take things a step further, users on Cesar.chat’s Business or Enterprise plans can use the analytics dashboard to fine-tune performance. This tool lets you track response rates for both standard LinkedIn DMs and Sales Navigator messages. You can even see which saved snippets (quick-response templates) are generating the most engagement. By keeping an eye on snippet performance, you can adjust templates to encourage more replies and interaction.
The analytics are designed to improve manual outreach efficiency, helping you manage conversations faster while maintaining a personal touch. By tracking which conversations lead to meetings or deals, you can refine your messaging strategy and ensure your CRM reflects genuine sales progress – not just activity logs.
If certain contacts or companies aren’t syncing, double-check the CRM records for missing details like email addresses, company websites, or phone numbers. LinkedIn’s matching system depends on these fields, and incomplete data can cause records to be skipped. Make it a habit to review your sync health regularly to keep your pipeline accurate and up to date.
Conclusion
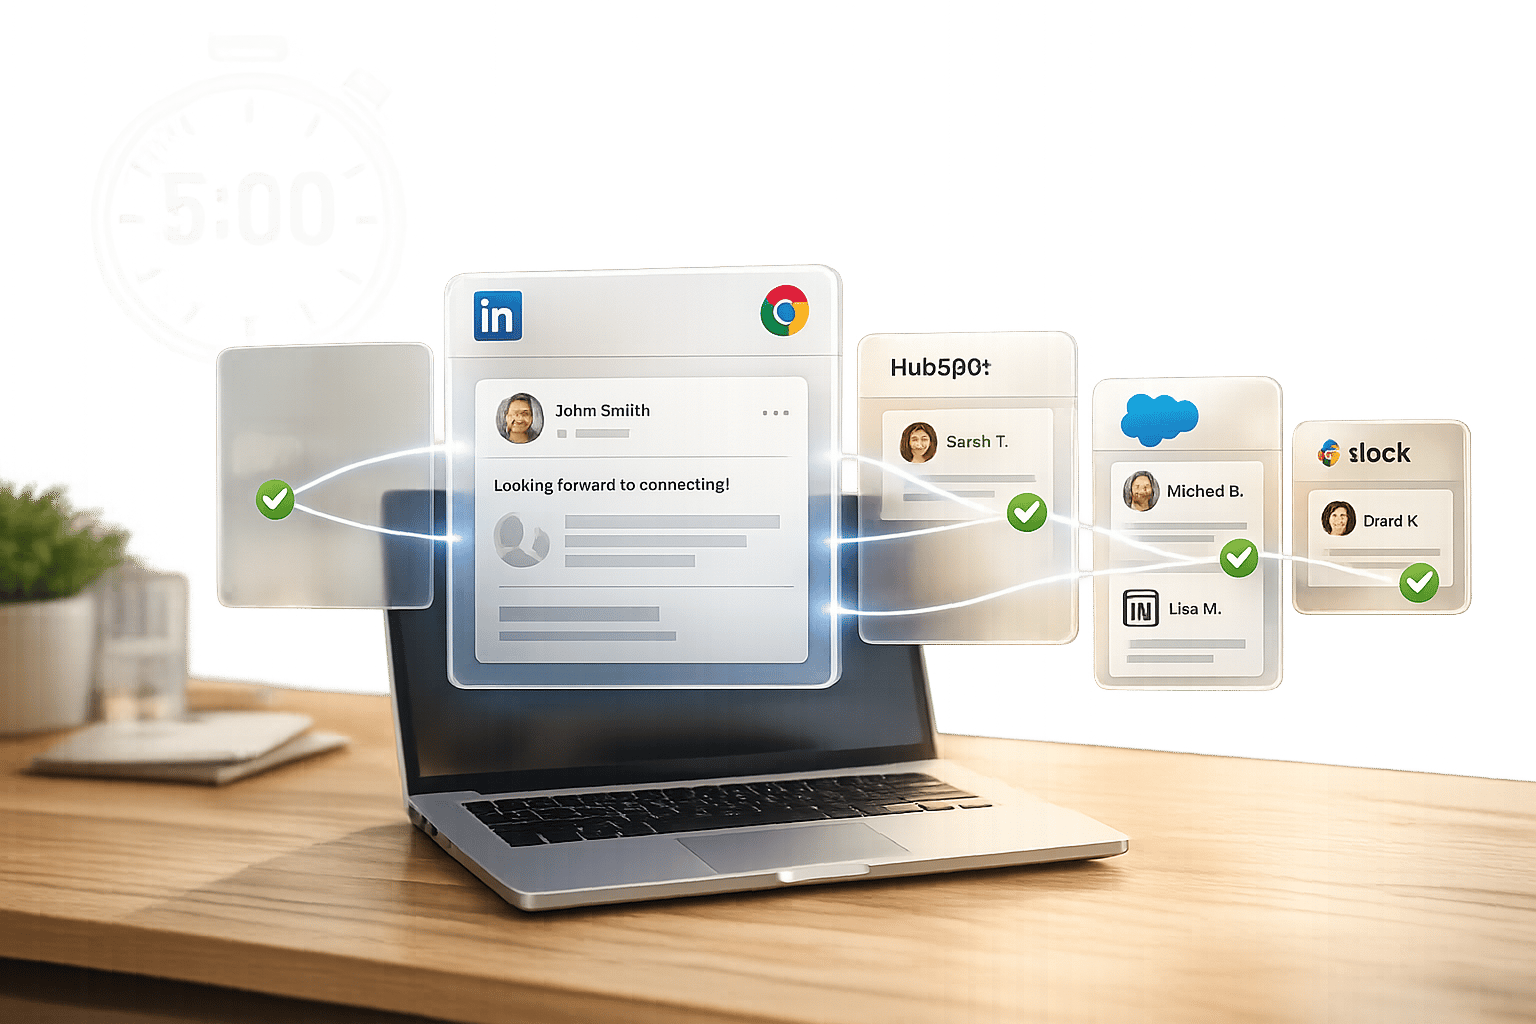
By following a few straightforward steps, you can connect your CRM to LinkedIn in just five minutes and start seeing the benefits right away.
The real payoff, though, comes after the setup. By automating what used to take 3–5 minutes of manual logging per message, this integration saves you hours each week – time you can now dedicate to strategic selling. Plus, it boosts team collaboration by centralizing all critical data in one easily accessible place.
Your team will gain complete visibility into prospect conversations, eliminating the problem of scattered sales intelligence stuck in individual LinkedIn inboxes. With every message, note, and label syncing automatically into your CRM, you can focus on what truly matters: building relationships and closing deals. This integration turns your daily LinkedIn activity into actionable insights that fuel your sales efforts.
As mentioned earlier, Cesar.chat’s split inboxes, keyboard shortcuts, and saved snippets are designed to streamline your workflow, allowing you to manage LinkedIn leads twice as fast. Whether you choose the Business plan at $32/month or the Enterprise plan at $40/month, the time and effort saved make the investment worthwhile.
Get started with setup, keep an eye on sync health, and use analytics to fine-tune your outreach. With your CRM always up to date, your team aligned, and fewer administrative tasks on your plate, you can focus on what you do best – selling.
FAQs
Will this sync my old LinkedIn messages too?
When you sync LinkedIn messages with your CRM, it usually only tracks messages sent or received after the integration is set up. Past messages won’t sync automatically. If you want to include older conversations, you’ll likely need to export them manually or log them into the CRM yourself. For exact steps, review your CRM’s integration options and features.
How do I choose what gets synced into my CRM?
To control what information flows into your CRM, adjust the sync settings either during the initial setup or through the integration options later. You can pick specific data types – like leads, contacts, accounts, or activities – to automatically save or update. Filters can also be applied to sync only the data that matters most, helping you align your CRM with your workflow and data management preferences.
What should I do if the sync stops working?
If your sync stops working, start by reviewing your integration settings and reconnecting if necessary. You might need to disconnect and then re-enable the sync within your CRM, ensuring all permissions are set up correctly. Check any platform-specific troubleshooting guides, reauthorize the connection, or reset the sync process. Also, make sure your software is up-to-date and that your account permissions are properly configured to address the issue effectively.