Your LinkedIn inbox can be more than just a messaging tool – it can be a powerful sales pipeline. Here’s how to make it work for you:
- Organize Messages by Sales Stage: Label conversations (e.g., "Activate", "Qualify") to track leads effectively.
- Set Automated Follow-Ups: Use tools to schedule reminders and ensure no lead is forgotten.
- Use Templates and Shortcuts: Save time with pre-written messages and keyboard shortcuts.
- Sync with Your CRM: Connect LinkedIn to platforms like HubSpot or Salesforce for seamless lead tracking.
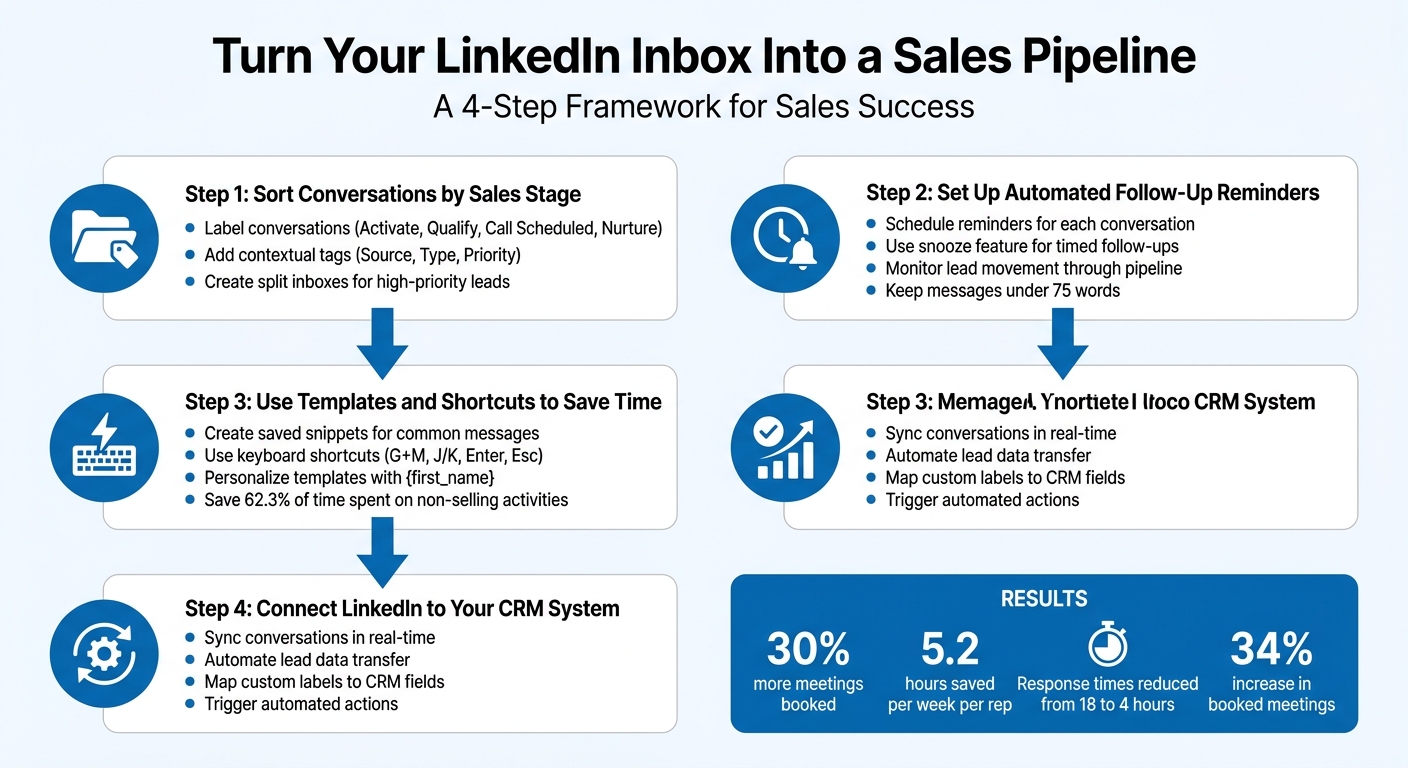
4-Step Process to Transform LinkedIn Inbox into Sales Pipeline
LinkedIn Inbox Management for Beginners (2026)
sbb-itb-3e8f5dc
Step 1: Sort Conversations by Sales Stage
The first step to transforming your LinkedIn inbox into a functional sales pipeline is to approach it with structure. Treat it as more than just a chat window. Instead of responding to messages as they come in – a surefire way to lose track of opportunities – organize your conversations based on their sales stage.
David Turewicz, Founder of Growth Momentum, explains it clearly:
"Treat the inbox like a pre-CRM pipeline, not a chat window. When you do that, every conversation needs structure, a stage, and a next step".
By categorizing your messages into distinct stages, you’ll avoid letting half-qualified leads fall through the cracks. This method ensures you can prioritize effectively and keep your workflow smooth. Here’s how you can implement this strategy.
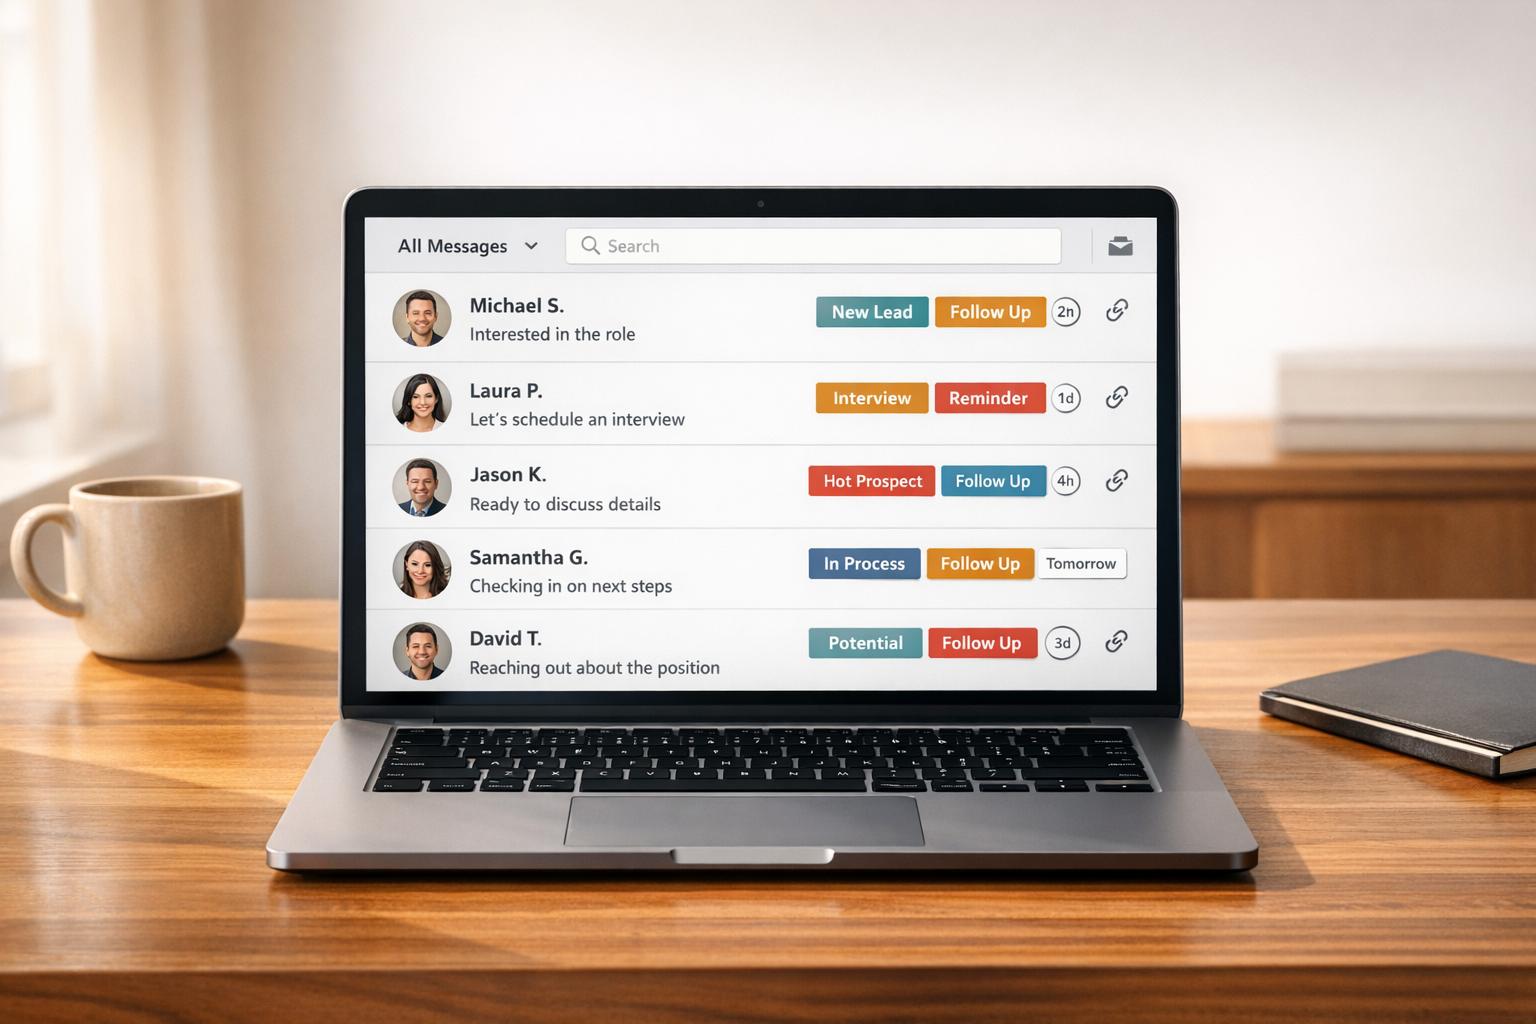
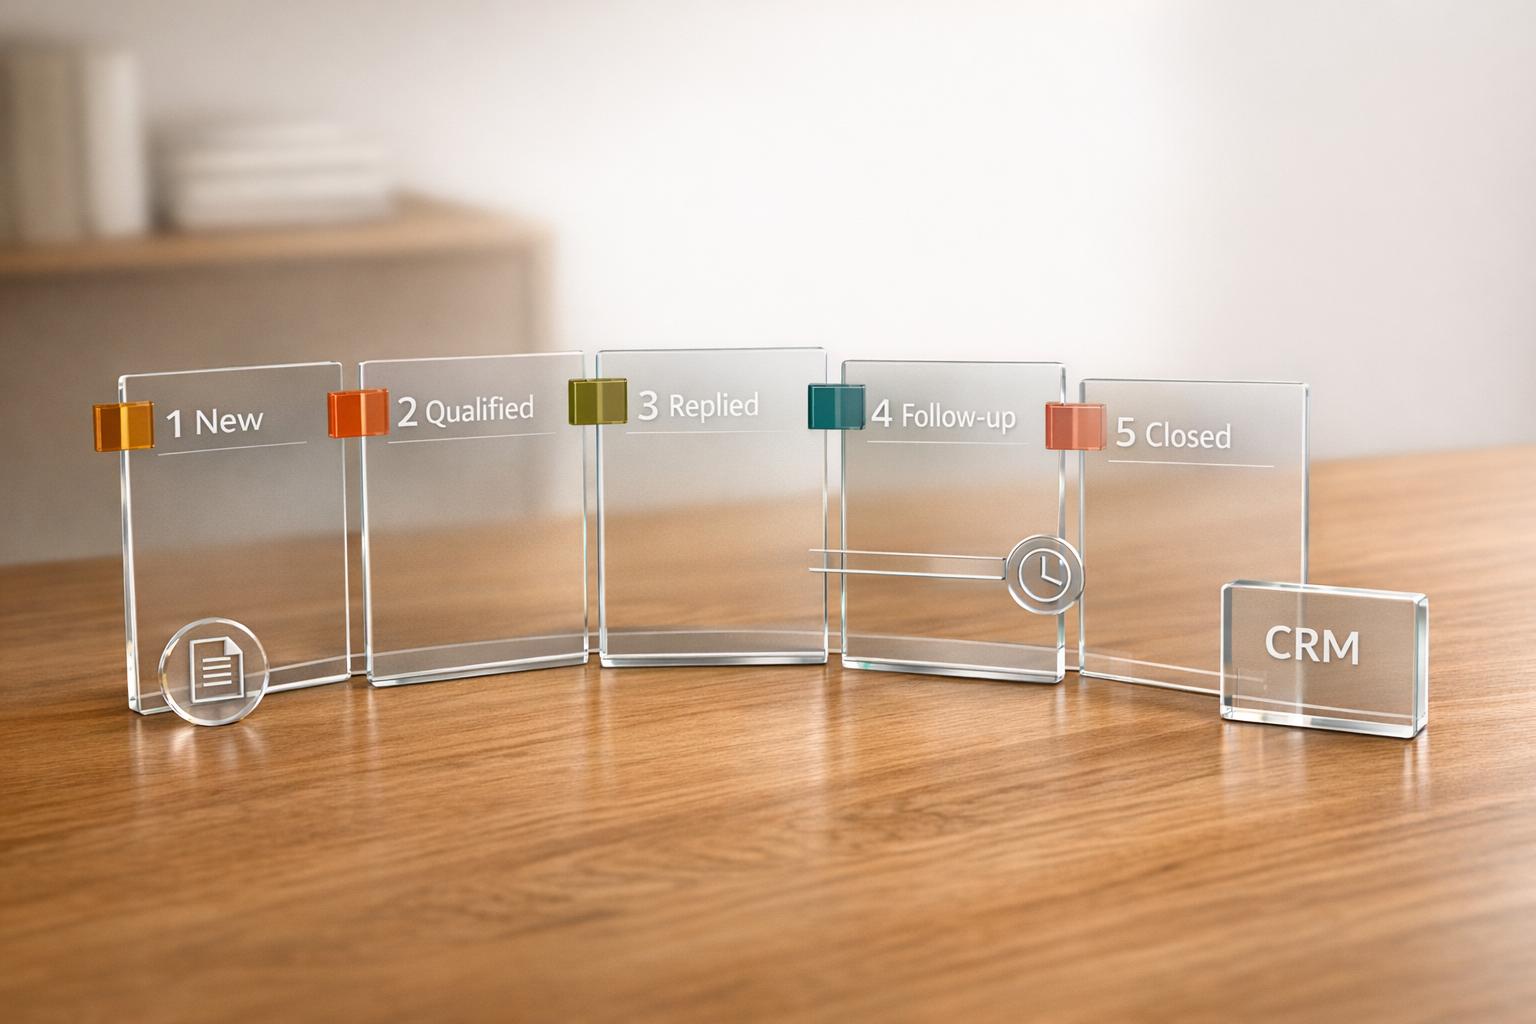
Label Conversations by Sales Stage
Start by creating a simple yet effective labeling system that mirrors your sales funnel. Labels act as visual cues, giving you quick insights into each conversation’s status and the actions required.
Instead of using broad terms like "Lead" or "Prospect", opt for more specific categories that better reflect your process. For instance:
- Label new conversations as "Activate" to highlight leads that need an initial response.
- Use "Qualify" for leads you’re still evaluating.
- Assign "Call Scheduled" to prospects with upcoming meetings.
- Mark less urgent leads as "Nurture" to revisit them later.
To take it a step further, add contextual tags to each thread. These can include:
- Source: Inbound, Outbound, Referral
- Type: Decision Maker, Influencer
- Priority: High Priority, Follow-Up Needed
This extra layer of detail ensures that you can filter conversations quickly and focus on the right leads at the right time.
Here’s an example framework:
| Label Category | Example Labels | Purpose |
|---|---|---|
| Sales Stage | Activate, Qualify, Booked | Tracks where a prospect is in the funnel |
| Lead Source | Inbound, Outbound, Referral | Identifies which channels are generating leads |
| Priority/Action | High Priority, Follow-Up Needed, Ghosted | Highlights conversations that need immediate action |
| Internal Notes | Job Applicant, Partner, Internal | Separates non-sales conversations to reduce clutter |
This system gives every conversation a clear status and next step, helping you maintain control over your pipeline without relying solely on a CRM.
Separate High-Priority Leads with Split Inboxes
Labels are a great starting point, but when your inbox starts filling up, scrolling through even a well-organized list can waste valuable time. That’s where split inboxes come in.
Split inboxes let you view only the conversations that matter most. Instead of navigating one crowded feed, you can create separate views for different priorities or lead statuses. For example:
- A dedicated inbox for "Hot Leads" to focus on your most promising prospects.
- Another for "Follow-Up Needed" to ensure no responses slip through the cracks.
- A third for "New Conversations" to stay on top of fresh leads.
Using tools like Cesar.chat can simplify this process. These tools allow you to filter messages into custom inbox views. For instance, you might set up a "Replies I need to handle" inbox to manage incoming responses or a "Priority Leads" view for your top prospects. This setup reduces aimless scrolling and ensures your attention stays where it’s needed most – on selling.
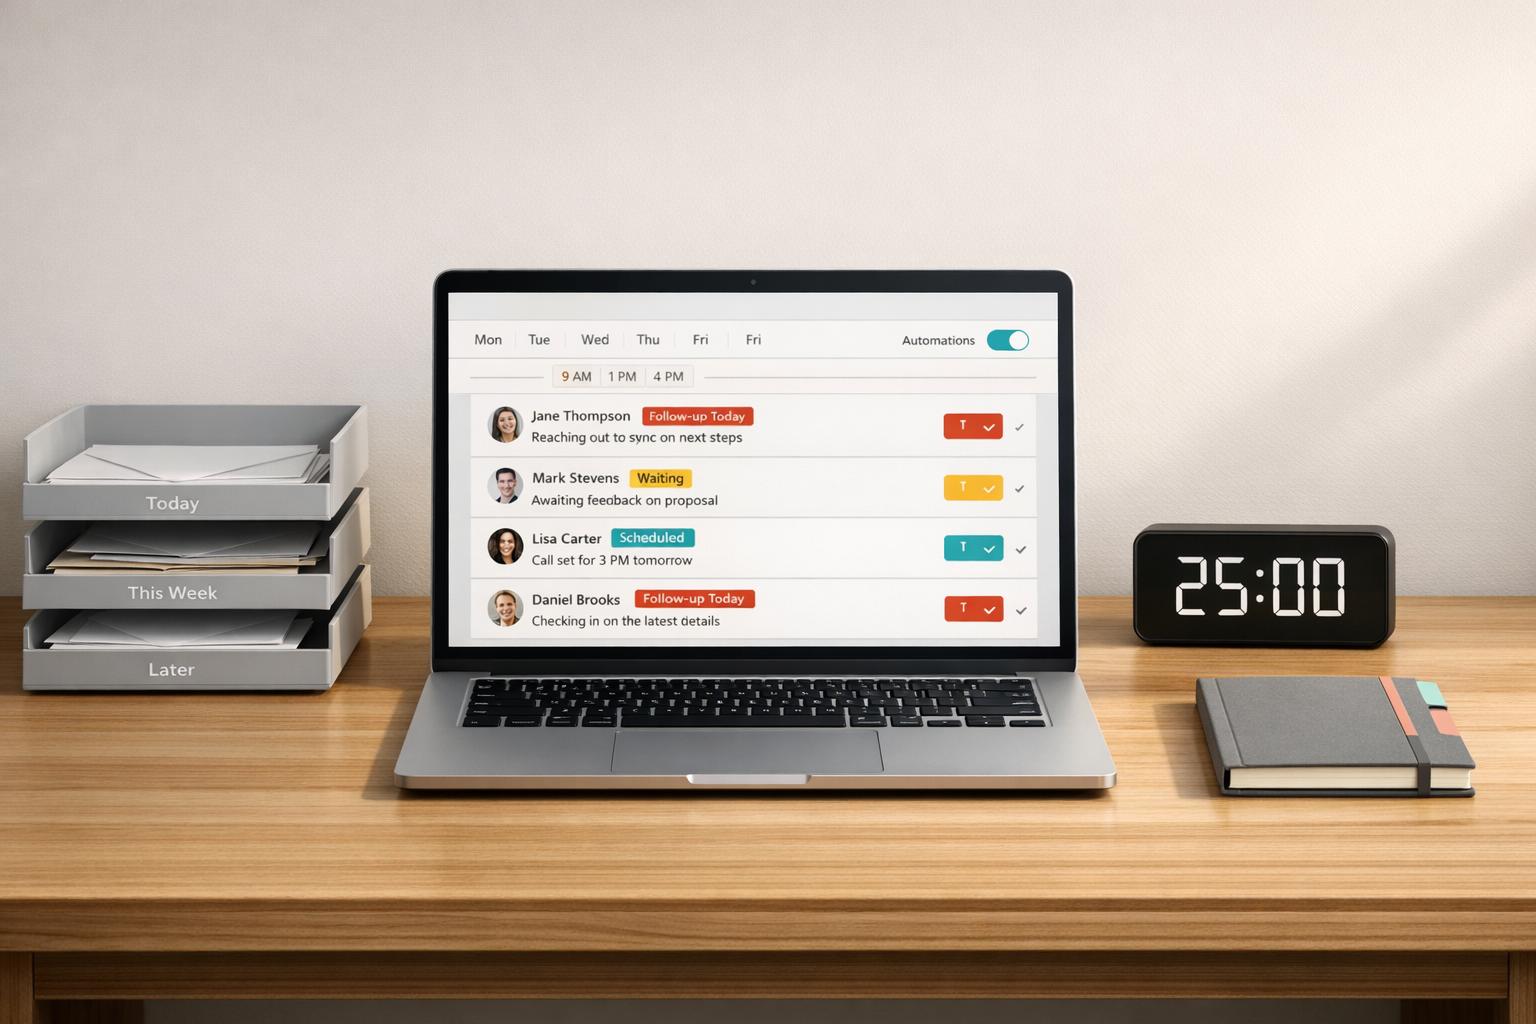
Step 2: Set Up Automated Follow-Up Reminders
Once you’ve organized your conversations by sales stage, the next hurdle is ensuring no lead gets overlooked. Even with a neatly managed inbox, it’s surprisingly easy for leads to fall through the cracks. Since LinkedIn lacks built-in message folders or advanced reminder systems, using automated follow-up reminders through a tool like Cesar.chat becomes essential for keeping your pipeline active and well-managed. Here’s how you can schedule reminders and track your pipeline efficiently.
Schedule Reminders for Each Conversation
The snooze feature is a game-changer for keeping your inbox clean while ensuring timely follow-ups. It allows you to temporarily hide a conversation until a specific time, essentially acting as an alarm for your next interaction. For instance, if a lead asks you to "circle back in three weeks", snooze the conversation to reappear exactly when you need it. This keeps your inbox tidy and ensures no follow-up is missed.
Tools like Cesar.chat let you attach reminders directly to LinkedIn conversations. You can set up a 14-day follow-up schedule, complete with personalized snippets, saving time while maintaining a personal touch. Keep your follow-up messages short and sweet – 75 words or less is ideal. Research shows that a concise, three-touch follow-up sequence can significantly improve reply rates.
Monitor Lead Movement Through Your Pipeline
Automated reminders are just one piece of the puzzle. You also need a clear view of how leads progress through your sales stages. By integrating your LinkedIn inbox with platforms like HubSpot, Salesforce, or even Google Sheets, you can automatically log every direct message in real time. This eliminates the need for manual data entry and keeps your pipeline updated. As leads advance (e.g., from "Qualify" to "Call Scheduled"), your CRM can trigger follow-up tasks automatically.
With Cesar.chat’s unified inbox, you can sync seamlessly with your CRM tools, reducing the risk of missed follow-ups. If you’re juggling both Sales Navigator and regular LinkedIn messages, a unified inbox is a must-have. You can filter messages by priority, sales stage, or the date of the last interaction, helping you focus on the leads that require immediate attention.
Step 3: Use Templates and Shortcuts to Save Time
Efficiency is key when you’re juggling multiple tasks. Sales professionals spend a whopping 62.3% of their time on non-selling activities like crafting repetitive messages. The fix? Build a library of message templates and get comfortable with keyboard shortcuts to save time without cutting corners.
Create Saved Snippets for Common Messages
LinkedIn makes it easy to create message templates right in the chat window. Just click "Use a Template" and then "+ Create New Template" to open the editor. Here, you can draft messages up to 2,000 characters and even use the {first_name} variable to automatically personalize each message. These templates sync seamlessly across both LinkedIn and Sales Navigator.
To keep things organized, name your templates based on their purpose, audience, or campaign. Examples include "Cold Outreach", "C-Suite", or "Q4 Partnership." This way, you can find the right message in seconds. Some of the most helpful templates include:
- Connection acceptance messages
- Follow-ups after no response
- Meeting requests
- Post-meeting summaries
Before sending, always tweak a line or two to make it personal. Mention a mutual connection, a recent post, or a company milestone to show you’ve done your homework.
If you’re using Cesar.chat, you can take it a step further with instant snippet shortcuts. Just type ; followed by a keyword, and your pre-written message pops up, ready to go. Combining these snippets with quick shortcuts makes messaging even faster.
Use Keyboard Shortcuts to Work Faster
Keyboard shortcuts can cut your messaging time in half. For example:
- Press
G+Mto jump to your inbox. - Use
Enterto send messages. - Navigate conversations with
J(down) andK(up). - Hit
Escto exit a conversation and return to your inbox.
"For SDRs processing 50+ conversations a day, [keyboard shortcuts] alone adds up to hours saved each week." – Kondo
Cesar.chat offers advanced shortcuts to keep things even more streamlined. Press E to archive, L to label, or H to snooze messages. Treat your inbox like a to-do list – archive, snooze, or label every message as soon as you read it. This "Inbox Zero" method ensures your pipeline stays tidy and helps you focus on the most important leads.
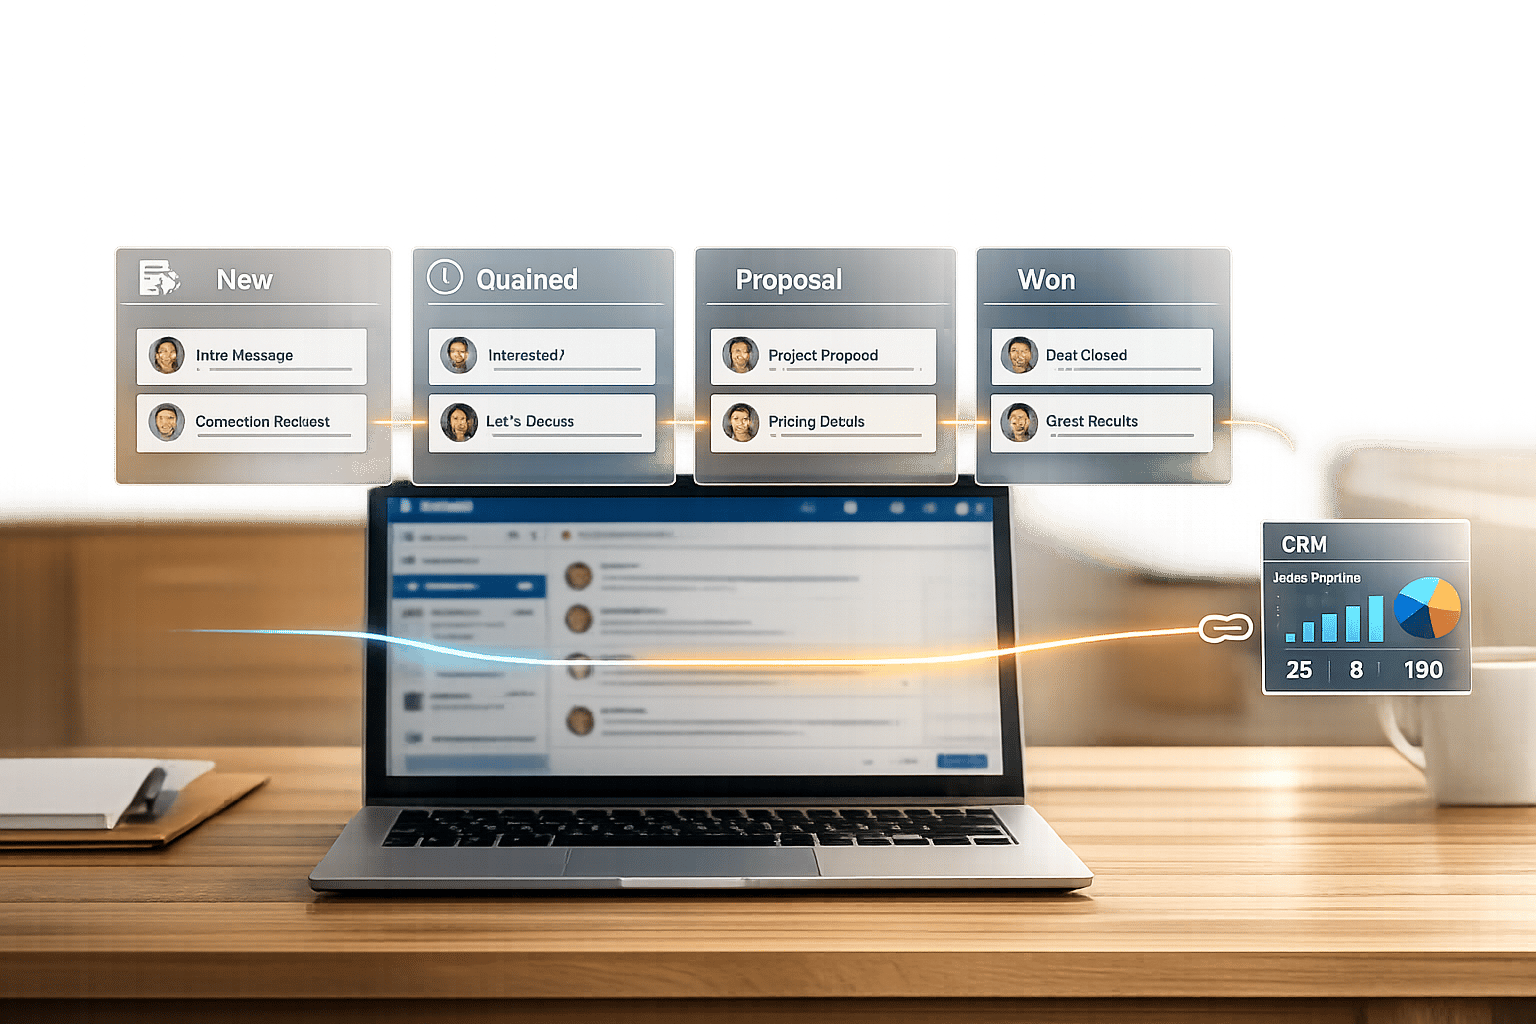
Step 4: Connect LinkedIn to Your CRM System
Your LinkedIn conversations can be a goldmine for sales data, but they’re only truly effective when they integrate seamlessly with your CRM. By connecting LinkedIn to your CRM, you ensure that every conversation, note, and label is automatically synced, saving time and keeping your data organized.
Sync Conversations Across Platforms
Cesar.chat makes real-time syncing with platforms like HubSpot, Salesforce, and Slack effortless, consolidating all your sales interactions in one place. With automatic streaming enabled, every LinkedIn message – including those from Sales Navigator – flows directly into your CRM timeline. The system matches conversations to existing contacts or creates new records if no match is found.
This setup allows your team to access complete conversation histories without juggling multiple platforms. For example, if a prospect sends you a LinkedIn message at 2:00 PM, it will appear in HubSpot within seconds. This real-time visibility enhances team collaboration and efficiency. In fact, sales teams using this system save over 5 hours per week by eliminating manual data entry tasks.
Once you’ve set up real-time syncing, you can take it a step further by automating data transfers for an even smoother workflow.
Automate Lead Data Transfer to Your CRM
Set up your integration to automatically capture key details like prospect names, company information, job titles, messages, and timestamps. You can also map custom labels – such as "Hot Lead" or "Negotiation Stage" – to specific CRM fields, keeping your pipeline structured and easy to manage. This automated data capture works hand-in-hand with follow-up reminders, ensuring no lead slips through the cracks.
Additionally, use automation rules within your CRM to trigger actions based on LinkedIn activity. For instance, if a prospect replies within two hours, the system can flag them as high-priority and notify your sales manager. Automated lead routing can also assign prospects based on criteria like deal size, industry, or location. Teams using these features report 25–30% faster first contact times compared to manual processes.
Before rolling out the integration fully, test it with 5–10 sample conversations to ensure field mappings are accurate. Once everything is running smoothly, you’ll achieve complete synchronization of LinkedIn activity with your CRM, eliminating tedious manual work.
Conclusion: Turn LinkedIn Messages Into Sales Results
Your LinkedIn inbox doesn’t have to drain your time or energy. By organizing conversations based on sales stages, automating follow-ups, utilizing templates, and syncing with your CRM, you can transform a chaotic inbox into a structured, revenue-generating tool.
And the results? They’re hard to ignore. Sales teams that adopt these strategies report booking 30% more meetings compared to those who handle messages without a plan. During a 60-day trial, 12 sales reps saved an average of 5.2 hours per week each, reduced response times from 18 hours to just 4, and boosted their booked meetings by 34%.
These numbers highlight how a thoughtful approach to managing LinkedIn messages can pay off. Think of your inbox as more than just a messaging app – it’s a sales tool that deserves structure and purpose. Every message should have a designated stage, a clear label, and a defined next step. Pairing organization with automation and CRM integration cuts down on admin tasks, giving you more time to focus on what drives results: engaging, meaningful conversations with potential customers.
"The goal isn’t to automate everything, but to eliminate repetitive tasks so your sales team can focus on what truly moves deals forward: meaningful conversations and lasting customer relationships." – Adina Timar, PhantomBuster
Take the first step today. Whether it’s setting up a saved snippet, creating split inboxes, or syncing a conversation to HubSpot, small changes can quickly add up to big improvements in your sales process.
FAQs
What sales stages should I use for LinkedIn message labels?
The stages for LinkedIn message labels should match your sales process. Typical stages might include activate, qualify, call scheduled, booked, new deals, partners, nurture, and ghosted. These labels are a handy way to keep track of where each conversation stands, helping you stay organized and focus on the most important leads.
How often should I follow up on LinkedIn without annoying prospects?
The best follow-up strategy involves sending four concise messages over a two-week span, spaced out evenly. Each message should focus on offering value rather than making requests. Keep them short – under 300 characters – to respect the recipient’s time. This method strikes a balance between staying persistent and maintaining a positive, non-intrusive connection.
What should I sync from LinkedIn messages into my CRM?
Easily transfer LinkedIn messages containing vital lead details and conversation history directly into your CRM. This includes interactions with prospects or clients, as well as any accompanying notes, labels, or follow-up tasks. By doing this, you can cut down on manual data entry, maintain complete context, and ensure your sales pipeline stays current and well-organized.